


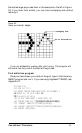
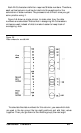
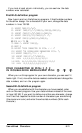
created more than one character, put the DATA numbers for each
character on a separate line as you see in the example below:
210 DATA 112,8,0,138,116,138,0,8,112
220 DATA 56,68,146,40,130,40,130,68,56
Check your work by making sure there are nine numbers in each
line and the numbers are separated by commas. Also make the change
in line 100 explained below.
Line 100 states K= 1; to define more than one character, use the total
number of characters you are defining instead of the 1 in that line.
(You can define as many as six characters. Just run the first program
several times and enter all the DATA numbers in this program.)
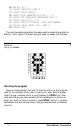
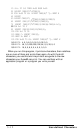
Running the program
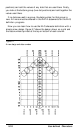
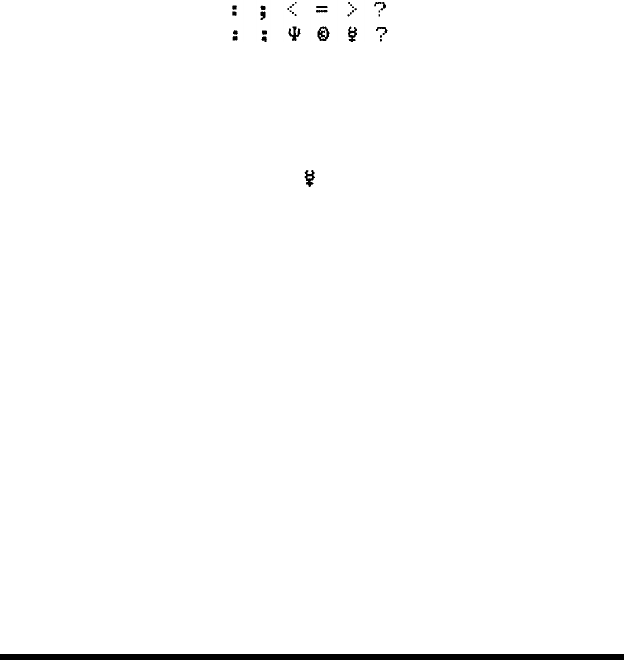
When you run this second program, it prints six characters, then re-
defines some or all of them and prints them again, as in the example
below.
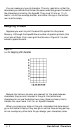
When printed by your own program, these two lines provide you
with a key to the characters your Apex80 can now print. When you
press the key for one of the characters in the top row, the printer prints
the corresponding character in the bottom row. In the example above,
if you type < your Apex80 prints
(although your screen continues
to show the character <).
Because the program puts these new definitions in your printer’s
Random Access Memory (RAM), it prints the new characters (the ones
in the bottom row) unless it is turned off.
If you have designed a few characters and want to use them with
your word processing program, for example, just run the second
definition program before you start using your word processing
program. Then use the two-line printout as your guide to tell you
which keys to press for your new characters.
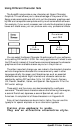
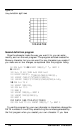
Defining NLQ Characters
Since NLQ characters use many more dots than draft characters,
defining NLQ characters is more complex than designing draft ones. If
User-defined Characters
5.7