


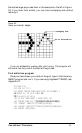
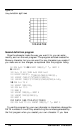
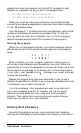
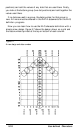
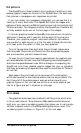

If you look at each column individually, you can see how the data
numbers were calculated.
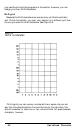
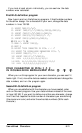
First NLQ definition program
Now type in and run the following program. It has the data numbers
for the arrow design. For a character of your own, change the data
numbers in lines 130-150.
10 LPRINT CHR$(27);"x1";
20 LPRINT CHR$(27);":";CHR$(0);CHR$(0);CHR$(0);
30 LPRINT CHR$(27);"%";CHR$(1);CHR$(0);
40 LPRINT CHR$(27);"&";CHR$(0);"< <";
50 LPRINT CHR$(0);CHR$(12);CHR$(0);
60
FOR X=1 TO
36
70 READ C: LPRINT CHR$(C);
80 NEXT X
90 LPRINT "YOUR CHARACTER IN PICA: < < <"
100 LPRINT "IN DOUBLE-WIDE EMPHASIZED PICA: ";
110 LPRINT CHR$(27);"!*< < <"
120 LPRINT CHR$(27);"!";CHR$(0);
130 DATA 4,0,0,8,0,0,16,0,0,32,0,0
140
DATA 64,0,0,255,255,192,64,0,0,32,0,0
150 DATA 16,0,0,8,0,0,4,0,0,0,0,0
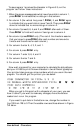
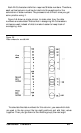
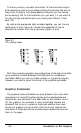
YOUR CHARACTER IN PICA:
IN DOUBLE-WIDE EMPHASIZED PICA:
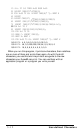
When you run this program for your own character, you can see if it
looks right. If not, move the dots as needed, recalculate and change the
data numbers, and run the program again.
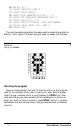
Second NLQ definition program
When you are satisfied with the character you have created, enter
and run the next program. Use your data numbers instead of the ones
in lines 140-160. If you want to define more than one character, change
line 10 so that J equals the total number of characters you are defining
(the maximum is six) and enter the extra data numbers (36 for each
character).
User-defined Characters
5-11