


Epson Stylus CX9400Fax Series
8/07 15
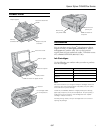
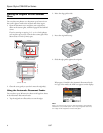
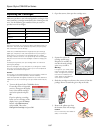
6. Insert the new ink cartridge into the holder and push it
down until it clicks into place.
7. Once you replace all the cartridges that need replacing, close
the cartridge cover and push it down until it clicks into
place.
8. Close the scanner.
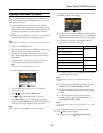
9. Press
OK to begin charging the ink. This takes about
2 minutes. When you see a completion message on the
display screen, ink charging is finished.
Caution:
To conserve ink, never turn off the Epson Stylus CX9400Fax Series
while ink is charging. If you see an ink replacement message on the
display screen, press OK and press down all the cartridges
securely.
If you remove a low or expended ink cartridge, you cannot reinstall
and use the cartridge.
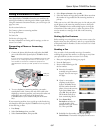
Aligning the Print Head
If your printouts become grainy or blurry, or you see dark or
light bands across them, you may need to align the print head.
You can align the print head using the control panel or your
software.
Note:
Banding may also occur if your print head nozzles need cleaning.
You can align the print head using the control panel or your
software.
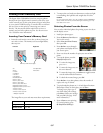
Using the Control Panel
1. Load a few sheets of plain paper in the sheet feeder.
2. Press the
Setup button.
3. Select
Maintenance and press OK.
4. Select
Head Alignment and press OK.
5. Press
Start. The alignment sheet prints.
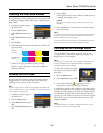
6. Check the alignment pattern that prints. Find the pattern in
each set that has the least visible vertical lines.
7. Select the number of the best pattern in the first set, then
repeat for the other sets.
8. Press
OK when you’re done.
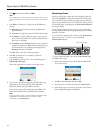
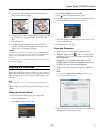
From the Computer
1. Load a few sheets of plain paper in the sheet feeder.
2. Windows: Right-click the printer icon in the bottom
right corner of your screen (the taskbar) and select
Print
Head Alignment.
Macintosh: Open the
Applications folder, open the
EPSON Printer Utility2, select CX9400Fax Series, and
click
OK. Then select Print Head Alignment.
3. Follow the on-screen instructions to print an alignment
sheet.
Note:
Do not press the Stop/Clear Settings button to cancel
printing of the alignment sheet.
4. Check the alignment pattern that prints and compare it to
the alignment criteria on your screen.