8
Part Names and Functions
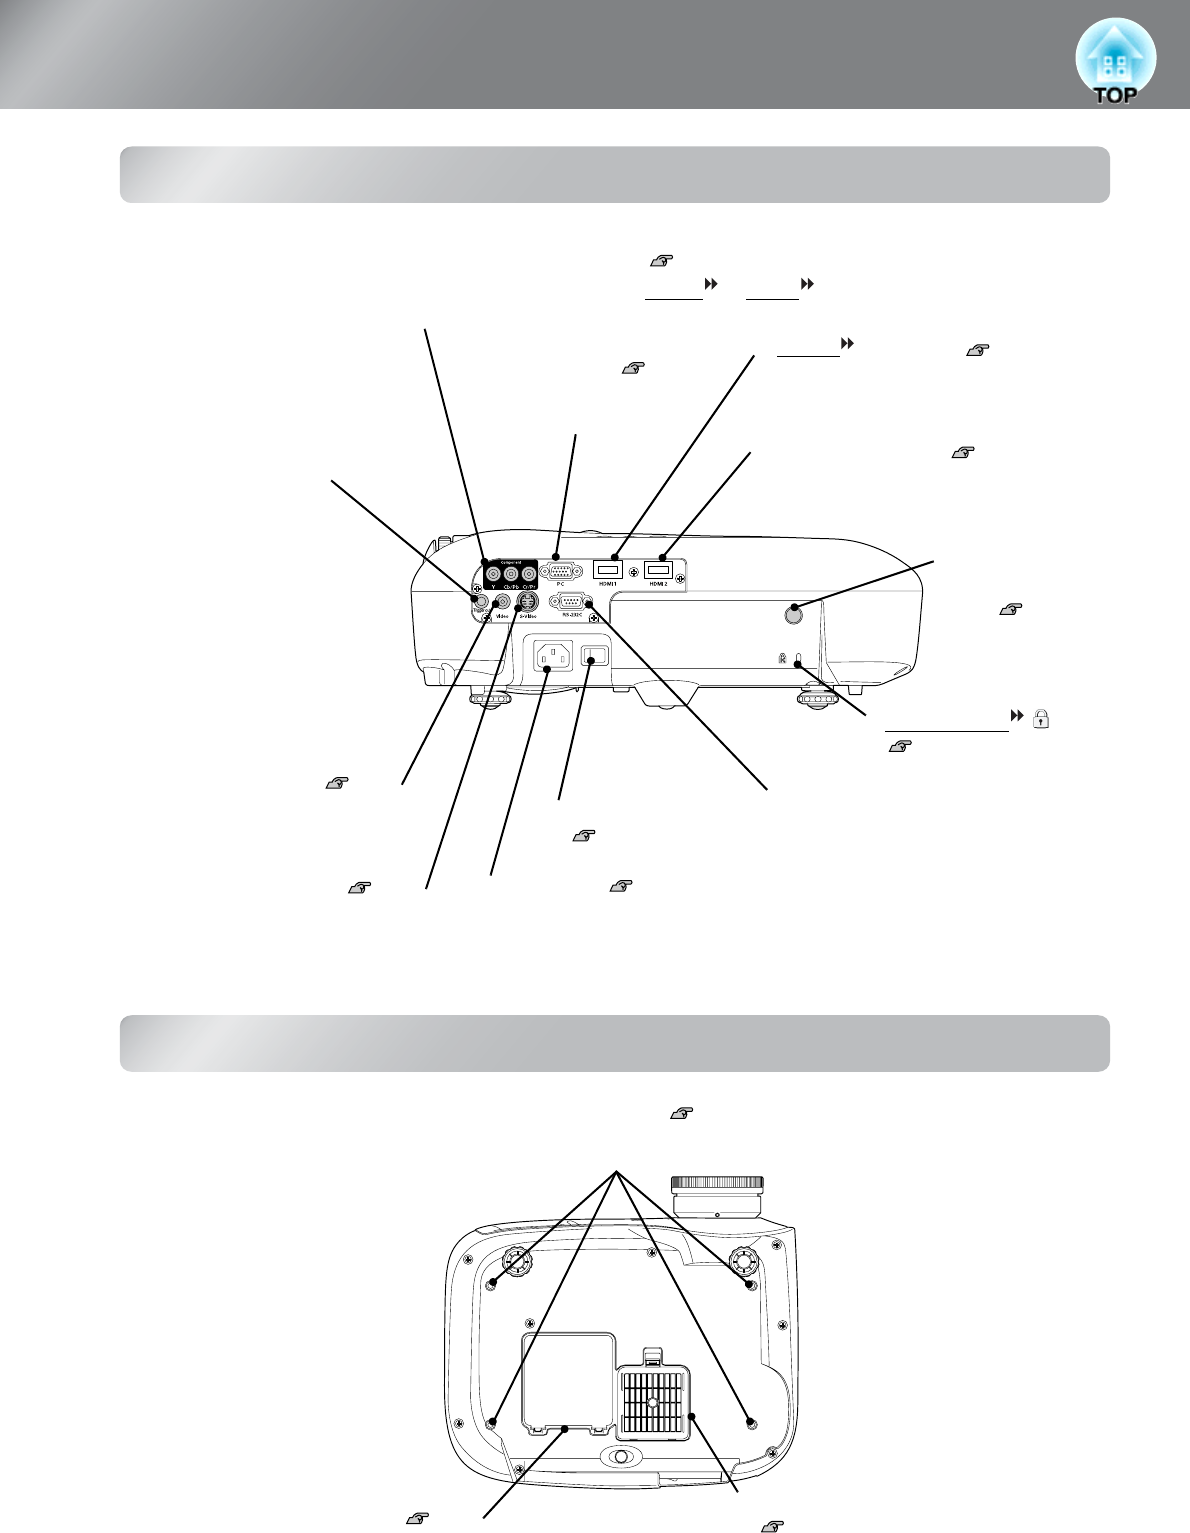
Rear
Base
• [Trigger out] port
When the projector power
is turned on, a 12 V DC
signal is output from this port.
When the projector's power is
turned off or a problem with
operation occurs, the output
becomes 0 V to send the
projector's power ON/OFF
status to an external device.
• [Video] input port p.12
Connects to general video out
ports of the video equipment.
• [HDMI1 ] input port p.12
Connects to video equipment or a
computer that is HDMI-compatible.
• [S-Video] input port p.12
Connects to the S-Video out ports of
the video equipment.
• [RS-232C] port
Connects the projector to a computer
using an RS-232C cable. This port is
for control use and should not be used
by the customer.
• Power inlet p.14
Connects the power cable.
• Main power switch
p.14
• Security lock
p.54
• Remote control
light-receiving
area p.13
Receives signals
from the remote
control.
• [PC] input port p.12
Connects to the RGB out
port of the computer.
• [Component] input port p.12
Connects to the component (YCbCr
or YPbPr ) out port of the
video equipment.
• [HDMI2] input port p.12
Connects to video equipment or a
computer that is HDMI-compatible.
• Suspension bracket fixing points (4 points) p.48
Install the optional ceiling mount here when suspending the projector from a ceiling.
• Air filter (air intake vent)
p.44, 46
Prevents dust and other foreign particles
from being drawn into the projector.
It should be cleaned periodically.
• Lamp cover p.46
Open this cover when replacing the lamp
inside.


