


38
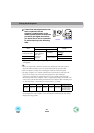
• If you press the [Auto] button while the E-Zoom or Freeze function is being used or
while a configuration menu or help menu is being displayed, the function will be
cancelled when you press the [Auto] button, and then the adjustment will be carried
out.
• Sometimes the signals may not be adjusted correctly depending on the type of signals
being output by the computer. In such cases, use the configuration menu commands to
adjust the tracking and sync settings manually. (p.38, 39)
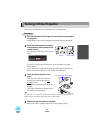
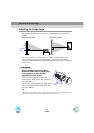
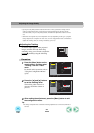
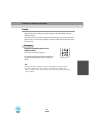
If vertical stripes appear in the projected
images, and this cannot be fixed using
automatic setup, you will need to adjust the
tracking
manually using the following
procedure.
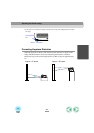
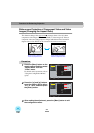
Procedure
1
Press the [Menu] button on the
remote control, and then select
"Tracking" from the "Video"
menu.
For details on this operation, refer to
"Using the Configuration Menus".
(p.56)
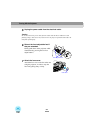
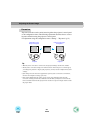
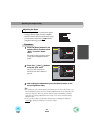
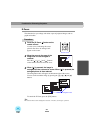
2
Press the [ ] and [ ] buttons
to set the tracking value.
The tracking value increases or
decreases each time a button is
pressed.
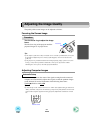
3
After making the adjustment, press the [Menu] button to exit
the configuration menu.
Tip :
The image will flash when continuous tracking adjustment is carried out, but this is
normal.
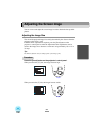
Adjusting the Tracking
Input Signal
Color Mode Select
Video
Audio
Setting
Advanced
About
Position
Adjust
Tracking
0000
Sync . 0
Brightness 0
Contrast
Sharpness 0
RGB
YUV( YCbCr YPbPr)
Auto Setup
Reset
Execute
: Select: Return : Adjust
Reset All
+
-
+
-
0
+
-
ON OFF
:
:
:
:
:
:
:
[Normal ]
+
-
+
-
+
-
Video
Audio
Setting
Advanced
About
Reset All
Input Signal
Color Mode
Position
Tracking
Sync .
Brightness
Contrast
Sharpness
Auto Setup
Reset
:
:
:
:
:
:
:
Select [Normal ]
0
0
0
0
1000
Adjust
Execute
RGB
YUV( YCbCr YPbPr)
ON OFF
: Select: Return
: Adjust
Adjusting the Image Quality