Epson PowerLite 745c Projector
12 - Epson PowerLite 745c Projector 8/04
6. Select the appropriate settings for your mode:
7. When done making settings, highlight the
OK button at
the top of the screen. Then press
Enter. Highlight the OK
button again and press
Enter to return to the main EasyMP
Network Screen.
Configuring the Network Settings for Windows
Before connecting to the projector wirelessly, make sure your
computer is configured correctly. Also, make sure that the
Internet Connection Firewall is disabled. (See your Windows
online help system for details.)
Note:
Depending on your computer’s wireless network adapter card,
the dialog boxes you see may be different than those shown in
this section.
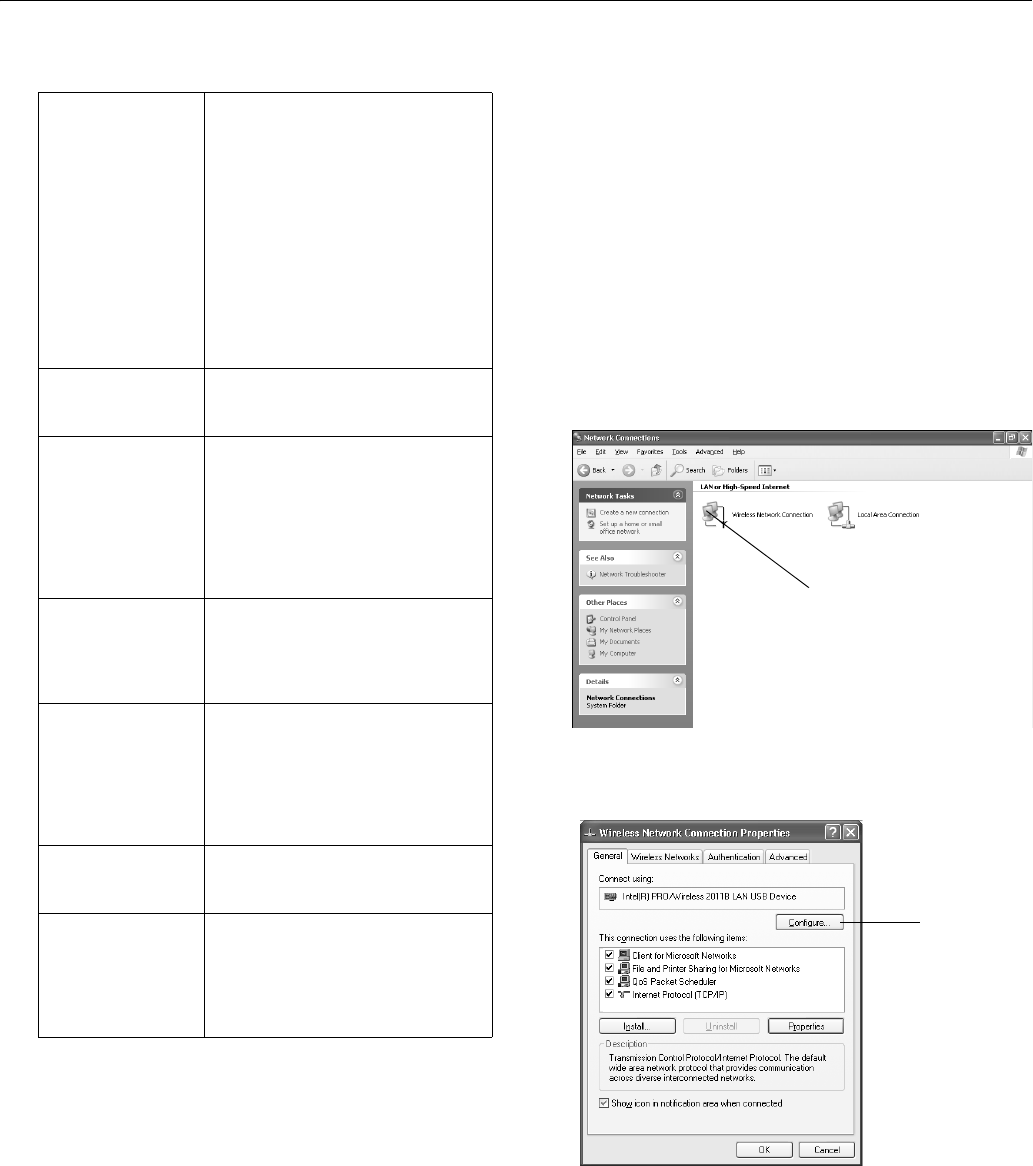
1. Access your wireless network Properties window. For
example, in Windows XP click
Start > Control Panel >
Network and Internet Connections
. Then double-click
the
Network Connections icon. You see a screen similar to
this:
2. Right-click the
Wireless Network Connection icon and
select Properties. You see a screen like this:
ESSID Ad Hoc: Enter an ESSID in the ESSID
textbox.
Access Point: Enter an ESSID, which
is the SSID name of your access point
or the name of your AirPort network.
(The name of your AirPort network
may be different from that of your
AirPort base station; select your base
station in the AirPort Admin utility and
click Configure to check the name of
your network.)
Note that the ESSID is case-sensitive.
Password for WEB
control
If you want to create a password for
an internal web page, you can enter
up to 8 alphanumeric characters.
Projector keyword Turn this option on if you want to set
up a security keyword so that only
people in the same room as the
projector can access it. When you
connect to the projector wirelessly, it
displays a four-digit randomized
keyword on the screen that you need
to enter when prompted.
DHCP (Access Point
mode only)
If your access point assigns IP
addresses automatically, turn this
option on. Otherwise, turn it off and
assign an IP address, subnet mask,
and gateway address manually.
IP address (Access
Point mode only)
Enter the IP address you want to
assign the projector. It must be
formatted like other addresses on the
network; usually the first three
sections match the access point’s IP
address. The last section should be
unique.
Subnet mask.
(Access Point mode
only)
Enter a subnet mask formatted like
other subnet masks on your network.
Gateway address
(Access Point mode
only)
Enter the IP address that was assigned
to your access point or AirPort base
station when it was set up. If you don’t
know the address, see “Checking the
Gateway (Access Point’s) IP Address”
on page 14.
Right-click and select Properties
Click here


