15
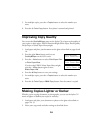
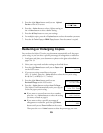
3. Press the right Menu button until you see Lighter/
Darker
on the LCD screen.
4. Press the
– Value button to select a lighter setting, or
the
+ Value button to select a darker setting.
5. Press the
y Stop button to save your settings.
6. For multiple copies, press the
+ Copies button to select the number you want.
7. Press the x
Color Copy or B&W Copy button. Your document is copied.
Reducing or Enlarging Copies
You can have the Stylus CX resize your document automatically to fit the paper
you’re using, or you can select a specific percentage of enlargement or reduction.
1. Load paper and place your document or photo on the glass as described on
pages 9 to 13.
2. Select your copy mode and other settings as described above.
3. Press the right
Menu button until you see Paper size
on the LCD screen.
4. If you are not using normal letter-size paper
(8.5
x 11 inches), press the – Value button to select the size you’re using:
4 x 6, 5 x 7, or A4 (8.3 x 11.7 inches).
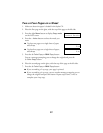
5. Press the right
Menu button until you see
Reduce/Enlarge on the LCD screen.
6. Press the
– Value button to select Auto Fit Page.
The Stylus CX will automatically resize your copy to
fit the size paper you are using.
■ If you want to convert from one size to another,
press the
+ or – Value buttons to select the setting
you want, as listed on page 8.
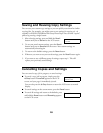
■ If you want to select a specific percentage of
enlargement or reduction, press the right
Menu
button until you see
Zoom In/Out on the screen.
Then press the
+ or – Value buttons to select the percentage you want.
Lighter/Darker
– NnnonnO +
Paper size
Letter
Reduce/Enlarge
Actual:100%
Reduce/Enlarge
Auto Fit Page
Reduce/Enlarge
4x6->Letter
Zoom In/Out
100%


