


2. Unpacking
Before removing the MX-80 F/T from the carton, check the box for evidence of
shipping damage or mishandling. If such evidence is present, notify the carrier
immediately.
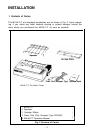
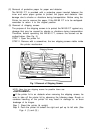
2.1. Unpacking steps
Unpacking steps are as follows:
STEP 1. Open the carton.
STEP 2. Remove accessories.
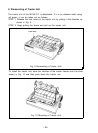
STEP 3. Remove the MX-80 F/T by holding its underside and lifting it straight
up with the packing material attached.
STEP 4. Place the Printer with the packing material on a table or any other con-
venient flat surface.
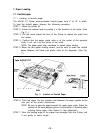
STEP 5. Take off the packing material carefully.
STEP 6. Remove the vinyl cover.
2.2. Repacking steps
Repacking can be carried out by following the above steps in the reverse order.
(Repacking: Shipment for repair, storage, etc.)
NOTE: It is recommended that all original packing materials be saved for reuse in case
the MX-80 F/T requires reshipment in the future.
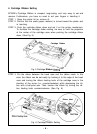
3. Installation of the Printer
(1) Operating site selection
When installing the MX-80 F/T, observe the following instructions.
(a)
(b)
(c)
(d)
(e)
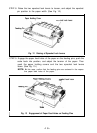
Place the Printer on a bench, tabletop or any other convenient flat sur-
face with enough room for the separator in the back of the Printer.
NOTE: Rubber feet are provided to prevent the marring of the surface on
which the MX-80 F/T is placed.
Avoid operating the MX-80 F/T in places where it may be exposed to
direct sunlight or where a great deal of greasy dust exists in the air.
NOTE:
Greasy dust may cause the malfunction of the print head.
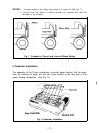
Connect the power cord to an outlet separated from those connected
to noise-generating equipment, such as large-power motors, refrigera-
tors, etc.
Do not subject the Printer to temperatures below 5°C
(4O’F)
or above
35°C (95’F) during operation, to sudden changes in temperature, or to
extreme shock.
Avoid use of the Printer in humid locations or in the vicinity of heat
generating sources such as heater, etc.
-3-