


DTP T EU 332, DTP T EU 232, DTP T MK 332, and DTP T MK 232 • Installation and Operation 17
Operation
The DTP T EU and DTP T MK units can be controlled only by SIS commands (see Simple
Instruction Set Control on page 19) or the Product Configuration Software (see Product
Configuration Software on page 26). This section contains basic information about
operation details. Topics in this section include:
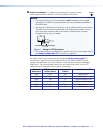
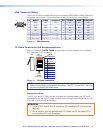
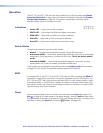
Indications
PWR HDCP HDMI VGA AUTO
• Power LED — Lights when power is applied.
• HDCP LED — Lights when the HDMI input signal is encrypted.
• HDMI LED — Lights when an HDMI input signal is detected.
• VGA LED — Lights when a VGA input signal is detected.
• Auto LED — Lights when the device is in auto switch mode.
Switch Modes
The switching transmitter has three switch modes:
• Manual — The input must be selected manually using an SIS command
• Auto switch (VGA) — The switcher automatically selects the input with an active signal
present and, if both are present, prioritizes the VGA input. This is the factory default
mode.
• Auto switch (HDMI) — The switcher automatically selects the input with an active
signal present and, if both are present, prioritizes the HDMI input.
These modes can be selected through SIS commands (see Switch mode SIS commands
on page 22) or the Product Configuration Software (see the PCS Help file).
EDID
To manage EDID on the DTP T EU and DTP T MK units, use SIS commands (see EDID SIS
commands on page 23) or the Product Configuration Software (see the PCS Help file). The
DTP T EU and DTP T MK units can record and save EDID in a user memory location, select
a pre-defined EDID, or use EDID from a display connected to a receiver. EDID stored in the
user memory location can come from the display connected to a receiver or a custom EDID
imported through the Product Software.
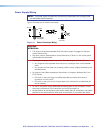
Reset
Use the recessed Reset button on the side of the transmitter (see figure 3 on page 7 and
item
G
on page 8) to initiate a reset to the default settings. Press and hold the reset button
for approximately 6 seconds. All front panel LEDs cycle. Release the button. This reset is the
equivalent of issuing the Reset SIS command (
E
ZXXX
}
, see page 25).