


Refer also to the MPX Plus 866 A User’s Manual at www.extron.com.
Refer also to the MPX Plus 866 A User’s Manual at www.extron.com.
Saving or Recalling a Preset
N
Presets saved from the front panel are always global
ties presets. These presets are complete, ties only,
configurations that overwrite all ties in the current
configuration when recalled.
Presets recalled using any operator interface can be either
global ties presets or partial presets (a subset of ties and/or
sets of ties and/or signal processor settings). Partial
presets are created in the DSP Configurator program, and
can include audio parameters set in the DSP and only
selected ties. When recalled, partial presets overwrite only
those portions of the current configuration that are part of
the preset.
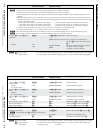
1
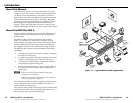
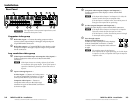
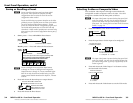
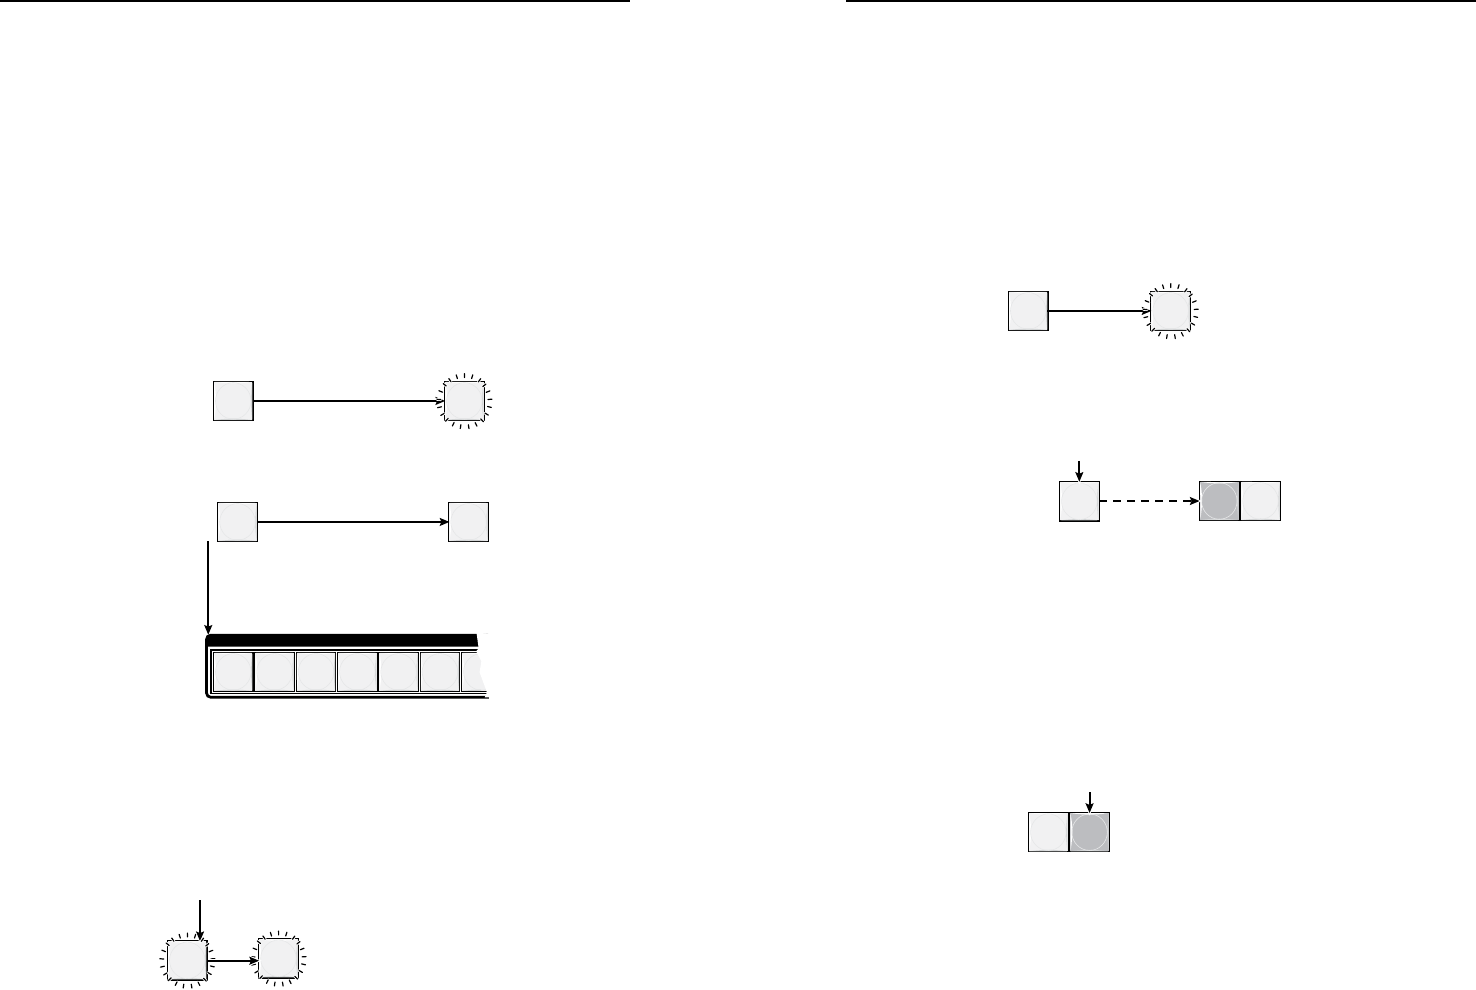
. Save a preset — Press and hold the Preset button.
PRESET
PRESET
Preset button blinks. Release.
Press and hold.
2 seconds
Save a
preset
Recall a preset — Press and release the Preset button.
PRESET
PRESET
Recall a
preset
The Preset button lights.Press and release.
All input and output buttons with assigned presets light red.
When a preset is saved, the configuration data at
assigned preset locations will be overwritten.
INPUTS
1
2
3 4
5
6
7
N
Presets 1 through 14 are assigned to Input buttons
1 through 14. Presets 15 through 26 are assigned to
Output buttons 1 through 12. Presets numbered higher
than 26 can only be saved and recalled using one of the
remote control methods introduced in chapter 4, "Remote
Control".
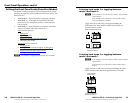
2
. Press and release the desired input or output button.
1
ENTER
The button blinks red to indicate that
this preset is selected to save or recall.
The Enter button blinks
red to indicate the need to
activate the save or recall.
3. Press and release the Enter button.
Selecting S-video or Composite Video
Low resolution video inputs 11 through 14 are individually
congurable as either composite video or S-video. View and
change this variable from the front panel as follows:
N
The input video format is protected when front panel Lock
mode 2 is selected. You can view the selected form of the
input in Lock mode 2 but you cannot change it from the
front panel. See “Setting the Front Panel Locks (Executive
modes)” on page 3-6.
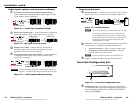
1
. Press and hold the Video button until it ashes.
VIDEO
VIDEO
Video button blinks.Press and
Hold
2 seconds
2. Press the input button for the input to be congured.
7 8
The lit Output button 7 or 8 indicates
the video format as follows:
7 — Composite 8 — S-video
13
The input button lights
to indicate the selection.
N
The input video format is protected when front panel Lock
mode 2 is selected. You can view the selected formats, but
you cannot change them. If you try to perform step 4, the
action is ignored.
3
. Press and release the Video Output 7 or 8 button to select
the associated video format.
7 8
7 — Composite
8 — S-video
Press the unlit output
button to select that format.
4. Press and release the Video button to exit the Video mode.
MPX Plus 866 A • Front Panel Operation
Front Panel Operation, cont’d
3-4
MPX Plus 866 A • Front Panel Operation
3-5