2. INSTALLATION
Page 13 © 2007 DH Instruments, a Fluke Company
2.5 POWER-UP AND VERIFICATION
2.5.1 SWITCH POWER ON
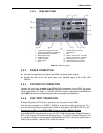
Actuate the power switch on the RPM4 rear panel. Observe the front panel display as RPM4
initializes, error checks and goes to the MAIN RUN screen (see Section 3.1.1). If the RPM4
fails to reach the main run screen, service is required. Record the sequence of operations
and displays observed and contact a DHI Authorized Service Provider (see Section 8,
Table 23).
Check that one of the two green Valve Status LEDs on the front panel of the HPMS is lit (the
red LED should NOT be ON). If neither of the green LEDs on the HPMS front panel lights,
check that the 12 pin circular connector at the rear of the RPM4 itself is properly connected to
the ACC. J1 connector.
2.5.2 CHECK PRESSURE MEASUREMENT OPERATION
2.5.2.1 CHECKING ABSOLUTE MODE PRESSURE MEASUREMENT
Let the RPM4 warm up with power ON for approximately 30 minutes.
Press [MODE] on the RPM4 and select absolute. If desired, change the
pressure unit of measure using [UNIT] (see Section 3.3.2).
Open the RPM4/HPMS TEST port to atmosphere. Put the valve knob in the
HPMS front panel into the Lo Q-RPT Active position. This opens the Lo and Hi
Q-RPTs to the HPMS TEST port.
Use [RANGE] (see Section 3.3.1) to select the Lo Q-RPT. Observe the RPM4
indicated pressure. Check that the agreement of the RPM4 indicated value with
a calibrated barometer in the same room is ± 0.15 psi. The calibrated barometer
must have a measurement uncertainty of ± 0.25% of better.
Use [RANGE] to select the Hi Q-RPT Check that the agreement of the RPM4
indicated value with a calibrated barometer in the same room is ± 0.5 psi.
If a Q-RPT does not agree within tolerance, it may need to be AutoZeroed (see
Section 3.3.9), calibrated (see Section 5.3) or repaired.
2.5.2.2 CHECKING GAUGE MODE PRESSURE MEASUREMENT
Let the RPM4 warm up with power ON for at approximately 30 minutes.
Open the RPM4/HPMS TEST port to atmosphere. Put the valve knob in the
HPMS front panel into the Lo Q-RPT Active position. This opens the Lo and Hi
Q-RPTs to the HPMS TEST port.
Use [RANGE] (see Section 3.3.1) to select the Lo Q-RPT. Press [MODE] on the
RPM4 and select gauge. If desired, change the pressure unit of measure using
[UNIT] (see Section 3.3.3).
The value indicated should be near zero. Press [AutoZ]. This runs AutoZ to
zero the Q-RPT reading (see Section 3.3.9.1). Upon return to the main run
screen, observe that the indication of measured pressure has zeroed.
Use [RANGE] to select the Hi Q-RPT and repeat the zeroing process.
If the display fails to zero properly for either Q-RPT, RPM4 may need repair.


