37
■ Installing and Removing Drives
In the standard model the PC may be equipped with the following drives:
One accessible 3
1
/2 inch drive (floppy drive)
One non-accessible 3
1
/2 inch drive (hard disk)
One accessible 5
1
/4 inch drive (e.g. DVD or CD ROM drive)
or:
One accessible 3
1
/2 inch drive (floppy drive)
Two non-accessible 3
1
/2 inch drive (hard disk)
"Accessible drives" are e.g. DVD or CD ROM drives, into which a data carrier can be inserted from
outside. Non-accessible drives are e.g. hard disk drives.
IDE drives and serial ATA drives
By default IDE drives and serial ATA drives are supported.
■ Replacing Drive in 5
1
/2 inch Bay
Open the casing (see "Opening the casing" chapter).
Removing a drive
1 Pull the data and the power supply connectors from the desired drive.
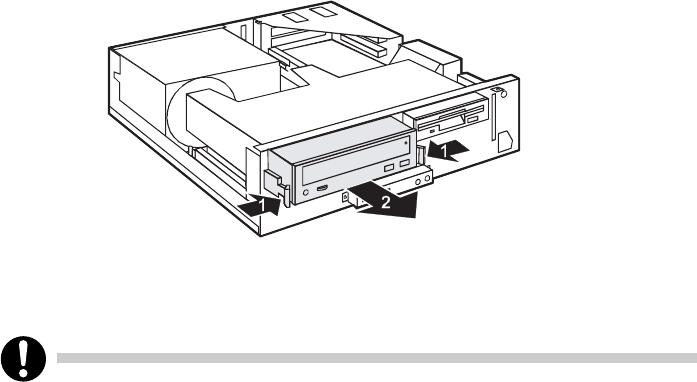
2 Press the EasyChange rails (1) together and pull the drive out of the casing (2).
3 Remove the EasyChange rails from the drive.
If your PC is equipped with a drive carrier instead of the drive, you can remove and install the
carrier in the same way.
CHAPTER 4(37-44) 6/5/03, 7:59 PM37


