Falcon 36 Operation Manual Maintenance and Troubleshooting
GBC Pro-Tech 1997 October 4-1
6HFWLRQ
0DLQWHQDQFHDQG
7URXEOHVKRRWLQJ
Performing regular maintenance on the Falcon 36
Laminator is critical to the proper operation of the
machine. A maintenance schedule and a section of
procedures for disassembling and reassembling the
serviceable areas of the laminator are included in
this section.
Table 6-1:
Maintenance Schedule
Daily
•
Clean/adjust the thermocouples
•
Clean the rolls
•
Inspect the electrical cord for
damage
•
Inspect the footswitch cord for
damage
Monthly
•
Adjust the nip
•
Check the chain tension
•
Inspect the area around the
laminator for possible hazards (dust
buildup, combustible items stored
too close, etc.)
Every
Six
Months
•
Lubricate the grease fittings and
chain
•
Check wire termination tightness
7KHUPRFRXSOH3RVLWLRQLQJDQG
&OHDQLQJ
One of the most crucial adjustments to the Falcon 36
Laminator is positioning the thermocouples and
making sure they are clean. There are two
thermocouples that control the temperature of the
main rolls. If a thermocouples loses contact with its
roll, the roll can overheat and be seriously damaged
or can even start a fire. Therefore, it is absolutely
critical that both thermocouples be clean and
positioned properly before operating the laminator
and it should become second nature to check their
condition prior to applying power to the laminator.
Tools required:
•
1
/
8
" hex wrench
•
80% isopropyl alcohol
•
100% cotton terry cloth
CAUTION
ALWAYS CHECK THE POSITION AND
CONDITION OF THE THERMOCOUPLES
PRIOR TO OPERATION! The thermal
junction of the thermocouples MUST make
contact with the laminating rolls to maintain
proper roll operating temperatures. The
thermocouples must also be free of adhesive
and dirt. The rolls can overheat and cause a
fire or seriously damage the laminator.
WARNING
Do not attempt to adjust the position of the
thermocouples if the rolls are hot. You can be
seriously burned.
To adjust a thermocouple:
1.
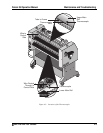
Locate the thermocouple to be adjusted using
the illustration in Figure 4-3.
2.
Remove the two screws securing the
thermocouple to the laminator using the
1
/
8
" hex
wrench and take the thermocouple out.
3.
Inspect the thermocouple. If there is any
adhesive or dirt on the thermocouple gently
clean it off with 80% isopropyl alcohol and a
cotton terry cloth.


