Maintenance and Troubleshooting Falcon 36 Operation Manual
4-4
GBC Pro-Tech 1997 October
&OHDQLQJ
Tools required:
• Adhesive coated board
• 80% isopropyl alcohol (or dishwashing
detergent)
• Rubber cement eraser
• Several 100% cotton terry cloths
• Protective rubber gloves
To clean the laminator rolls:
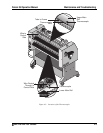
1. Remove the infeed table and infeed pressure
plate to gain access to the rolls.
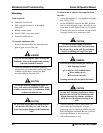
WARNING
Exercise extreme caution while cleaning the
laminator. You can be caught in the turning
rolls and crushed or burned.
2. While the laminator is at normal operating
temperature, put on the rubber gloves and, using
a rubber cement eraser, remove any heat
activated adhesive from the rolls.
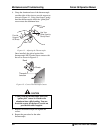
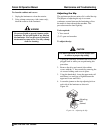
CAUTION
If silicone adhesive contacts the upper or
lower roll, remove it IMMEDIATELY using
a rubber cement eraser. It can harden within
an hour and ruin the roll.
CAUTION
Do NOT pick or pull heat activated adhesive
off the rolls when they are cold. You can
cause irreparable damage to the laminating
rolls.
To clean beads of adhesive, dust and dirt from
the rolls:
1. Allow the laminator to cool slightly to no higher
than 110ºF (43ºC).
2. Set the FWD/REV switch to the REV position
and use the footswitch to move the rolls as you
clean them. Set the Speed Control to 1.5 ft/min.
3. Clean the rolls using a moderate amount of 80%
isopropyl alcohol on a cotton terry cloth.
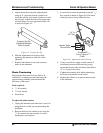
CAUTION
Use the minimum amount of pressure
necessary to clean the rolls. You can destroy
the silicone layer on the rolls by pressing to
hard or scrubbing too long in one spot.
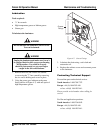
WARNING
Exercise care when cleaning the rolls with
80% isopropyl alcohol:
• Use only in a well ventilated area.
• Wear rubber gloves.
• Use only on cool rolls.
Cleaning heated rolls can ignite the fumes.
CAUTION
Use only 80% isopropyl alcohol or a rubber
cement eraser to clean the laminating rolls.
Harsh chemicals like toluene, acetone or
MEK destroy the silicone covering of the
rolls.
4. With the laminator rolls no hotter than 110º
remove dust and dirt from the silicone
laminating rolls by running an adhesive-coated
board through the laminator. Be sure to set the
nip for the thickness of the board used.
5. Allow the laminator to cool.


