


GA-M59SLI-S5/GA-M59SLI-S4 Motherboard - 98 -
English
Figure 11
Figure 12
GIGA-BYTE Technology Corp. PCIE-to-SATAII/IDE RAID Controller BIOS V1.06.12
[ Main Menu ]
Create RAID Disk Drive
Delete RAID Disk Drive
Revert HDD to Non-RAID
Solve Mirror Conflict
Rebuild Mirror Drive
Save And Exit Setup
Exit Without Saving
[ RAID Disk Drive List ]
[TAB]-Switch Window []-Select RAID [ENTER]-Detail [ESC]-Exit
[ Hard Disk Drive List ]
Mode Name Capacity Type/Status
HDD0: ST3120026AS 120 GB RAID Inside
HDD1: ST3120026AS 120 GB RAID Inside
Model Name RAID Level Capacity Status Members(HDDx)
RDD0: JRAID 0-Stripe 240 GB Normal 01
[ RAID Information ]
Name: JRAID
Level: 0-Stripe
Block: 128KB
Capacity: 81GB
Members: HDD 01
Status: Normal
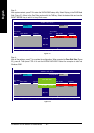
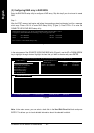
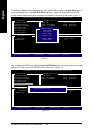
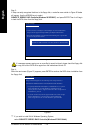
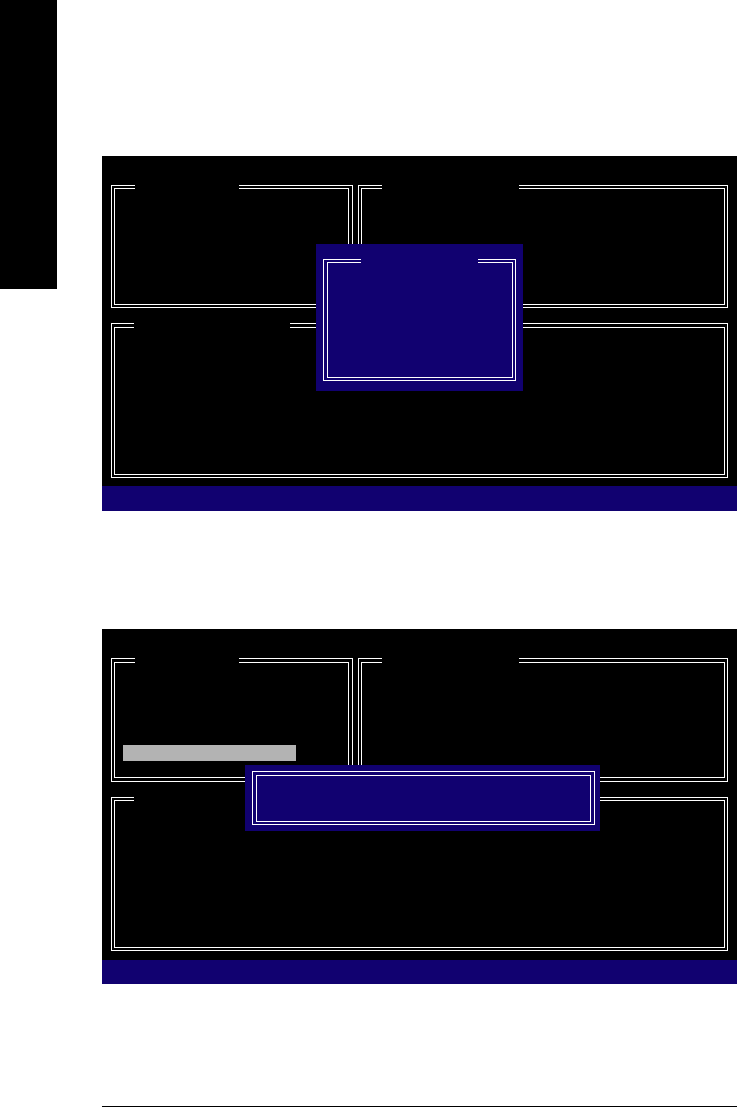
To check more detailed information about the array, use the TAB key while in the Main Menu block to
move the selection bar to the RAID Disk Drive List block. Select the array and press ENTER.
A small window displaying the array information will appear in the center of the screen (Figure 11).
GIGA-BYTE Technology Corp. PCIE-to-SATAII/IDE RAID Controller BIOS V1.06.12
[ Main Menu ]
Create RAID Disk Drive
Delete RAID Disk Drive
Revert HDD to Non-RAID
Solve Mirror Conflict
Rebuild Mirror Drive
Save And Exit Setup
Exit Without Saving
[ RAID Disk Drive List ]
[ Hard Disk Drive List ]
Mode Name Capacity Type/Status
HDD0: ST3120026AS 120 GB RAID Inside
HDD1: ST3120026AS 120 GB RAID Inside
Model Name RAID Level Capacity Status Members(HDDx)
RDD0: JRAID 0-Stripe 240 GB Normal 01
Save to Disk & Exit (Y/N)?Y
[TAB]-Switch Window []-Select ITEM [ENTER]-Action [ESC]-Exit
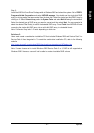
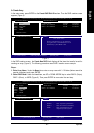
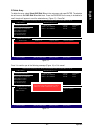
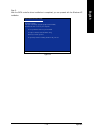
After configuring the RAID array, select the Save And Exit Setup item in the main screen to save your
settings if you wish to exit the RAID BIOS utility, then press Y (Figure 12).