Computer Configu
ration
Computer Confi
guration
SetUpanAutom
atic IP Address
The AWI requires an IP address obtained by your
computer. Set up your computer to obtain one
automatically.
1. Find the section for the browser that you use,
then follow the steps to set your computer to
obtain the IP address automatically.
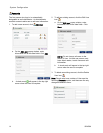
• Windows XP
a. Click Start, then click Control Panel.
b. On the Control Panel window, double-click
Network Connections.
NOTE: Check the upper left corner of the
Control Panel screen. Click Switch to
Classic View to easily locate the Network
Connections icon.
c. Right-click Local Area Connection, then click
Properties.
d. On the Local Area Connection Properties
window, click Internet Protocol (TCP/IP).
Then click Properties.
e. Select Obtain an IP address automatically
and Obtain DNS server address
automatically.
f. Click OK to save the changes.
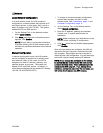
• Windows 7/Vista
a. Click the Windows icon, then click Control
Panel.
b. Under Network and Internet, click View
network status and tasks.
NOTE: At the upper right-hand corner of the
Control Panel window, you may change the
window’s view type. If you have Large icons
or Small Icons selected, you will click on
Network and Sharing Center instead.
c. Click Change adapter settings.
d. For Windows Vista, click Manage network
connections.
e. Right-click L
ocal Area Connection, then click
Properties.
f. On the Local A
rea Connection Properties
window, clic
k Internet Protocol Version 4
(TCP/IPv4).
Then click Properties.
g. Select Obta
in an IP address automatically
and Obtain D
NS server address
automatica
lly
.
h. Click OK to
save the changes.
• Windows 8
a. Press the Windows key on your keyboard to
show the Start screen, then click Desktop.
b. Right-click the Network icon located on the
bottom-right corner of the Desktop screen.
Then click Open Network and Sharing
Center.
c. Click Change adapter settings.
d. On the Ethernet Properties window, select
Internet Protocol Version 4 (TCP/IPv4). Then
click Properties.
e. Select Obtain an IP address automatically
and Obtain DNS server address
automatically.
f. Click OK to save the changes.
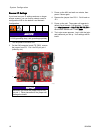
• Macin
tosh OS
a. Click the Apple icon, then click System
Preferences.
b. On the System Preferences window, click
Network.
c. On the Network window, look for the Show
field and select Built-In Ethernet.
d. Still on the Network window, look for the
TCP/IP tab. In the Configure IPv4 field,
select Using DHCP.
e. Click Apply Now.
2. Close your Control Panel and continue with
System Initialization.
8 332459A


