


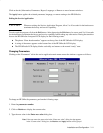
2-5
Installation and Configuration
Use the following instructions when helping the user install the software for the first time in the HP OfficeJet Series
300. Have the user perform the following steps:
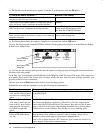
1. Check that the HP OfficeJet Series 300 device has been properly set up, and that it is connected to the computer,
turned on, and has paper loaded.
2. Close any open applications, saving files if necessary.
3. Insert Disk 1 of the HP OfficeJet Series 300 software
into the flexible disk drive.
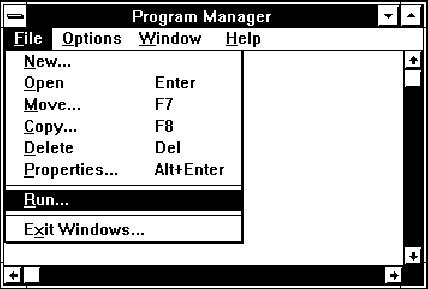
4. From the Windows Program Manager menu bar,
choose File/Run. The Run dialog box appears.
5. In the Command Line box, type one of the following commands, depending on which flexible disk drive is used:
A:SETUP.EXE
or
B:SETUP.EXE.
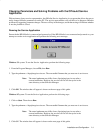
6. An “initializing” screen appears, followed by a screen that asks the user to select Standard Installation,
Custom Installation, or Uninstall.
We recommend that first-time users choose Standard Installation, which copies all the HP OfficeJet Series 300
software to the hard disk and sets up the device for printing, scanning, and PC faxing. For information about Custom
Installation, see “Performing a Custom Installation” in the HP OfficeJet Series 300 User’s Guide. For information
about the uninstall option, see “Using the Uninstall Option” in the HP OfficeJet Series 300 User’s Guide.
Click the Standard Installation button and then the OK button.
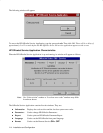
7. A screen appears, allowing the user to specify the directory in which the HP OfficeJet Series 300 software will be
installed. The default directory is C:\HPOJET.
If this is acceptable, click the OK button. If it is not acceptable, follow the instructions on the screen to select a
different directory. Then click the OK button.
8. As installation takes place, screens are displayed that provide “must know” information about the HP OfficeJet
Series 300. Reading these screens will give the user a head start on understanding how his new product works. Be sure
he has read these screens completely before inserting a new installation disk.
9. After all the files have been copied to the hard disk, the setup program tries to communicate with the
HP OfficeJet Series 300.
If the device is properly connected and turned on, a screen appears, giving the name of the port to which the HP
OfficeJet Series 300 is connected. Click the OK button.
10. If the setup program cannot find the HP OfficeJet Series 300, follow the troubleshooting instructions on the screen
to correct the problem. Then click the Retry button. The setup program tries again to communicate with the HP
OfficeJet Series 300. If it succeeds, a screen appears, giving the name of the port to which the HP OfficeJet Series 300
is connected. Click the OK button.
11. The PC Fax Cover Sheet Information dialog box appears. Complete it as directed, pointing and clicking in each
field to fill it in. When finished, click the OK button.
12. The Fax Header dialog box appears. Complete it as directed and click the OK button.