


2-32
Installation and Configuration
Setting the Number of Rings to Answer
The number of rings setting is ONLY used when the HP OfficeJet Series 300 is in the Auto Receive Mode. This setting
is determines the number of rings sensed before the HP OfficeJet Series 300 answers a call. Although the range of
rings may vary for different countries, in the U.S.A., up to 5 rings can be set. The factory default setting is 2 rings. If an
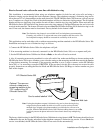
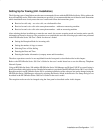
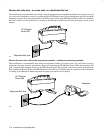
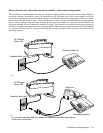
answering machine is connected to the
HP OfficeJet Series 300, ensure that the rings to answer setting of the HP
OfficeJet is greater than the rings to answer setting of the answering machine. If the answering machine has answered,
the OfficeJet will eavesdrop and take the call if another fax machine is calling. The number of rings
to answer in an HP
OfficeJet Series 300 is set during installation of the software, but can be changed using the HP OfficeJet Series 300
Manager software by setting the Rings to Answer in the Receive Fax Setup dialog box as described in the HP OfficeJet
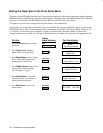
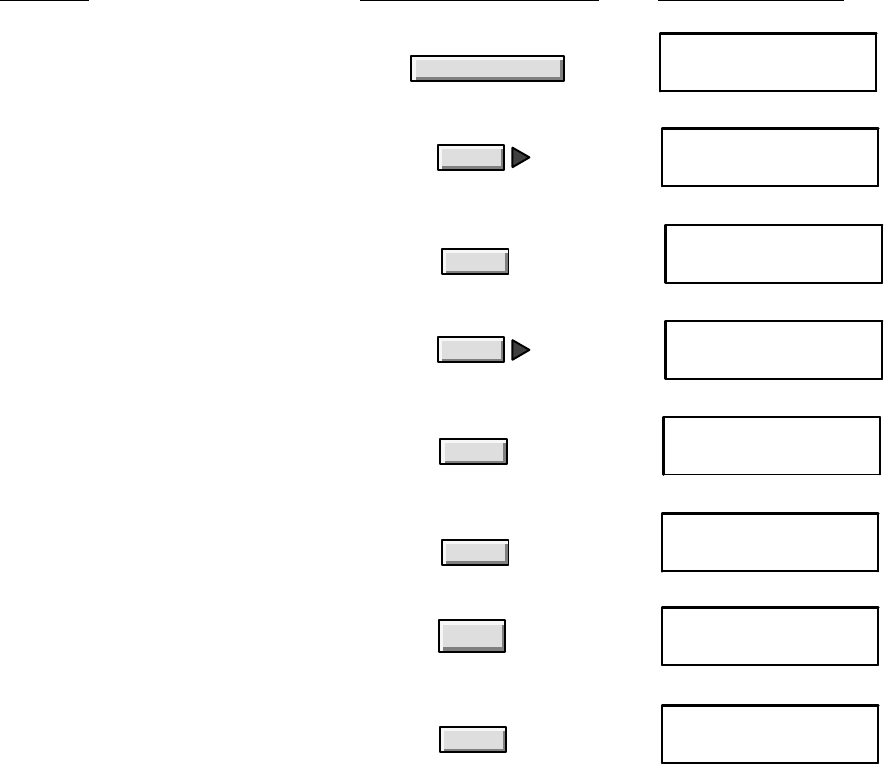
Series 300 User’s Guide for the user’s model. To change the rings to answer using the front panel use the following
instructions:
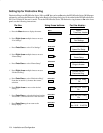
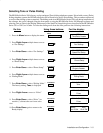
2. Press Right Arrow multiple times to move
to “Fax Settings.”
3. Press Enter/Save to select “Fax Settings.”
Enter/Save
Enter/Save
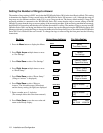
8. Press Enter/Save to save the new value and
return to the Ready display.
MENU
Fax Settings
FAX SETTINGS
Speed Dial Setup
Ready Auto
Nov-10-95 12:36 PM
1. Press the Menu button to display the Menu.
MENU
Time/Date, Header
Menu
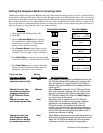
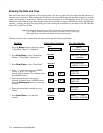
4. Press Right Arrow multiple times to move
to “Phone Setup.”
FAX SETTINGS
Phone Setup
5. Press Enter/Save to select “Phone Setup.”
(“Rings to Answer” is displayed.)
PHONE SETUP
Rings to Answer
Enter/Save
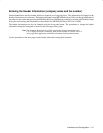
6. Press Enter/Save to select “Rings to
Answer.” The allowable range (in brackets)
and the factory setting (far right) are displayed.
Rings to Answer
[1-5] 2
Enter/Save
7. Enter a number up to 5, inclusive.
(The example shows that 5 has been entered.)
Rings to Answer
[1-5] 5
5
Do this:
Using these buttons: For this display: