


1-27
Installing the Tape Library
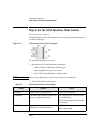
Step 7: Power On the System
Installation
Step 7: Power On the System
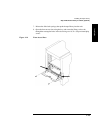
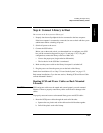
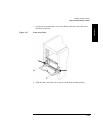
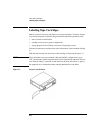
1. Plug the power cord into a grounded outlet.
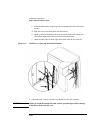
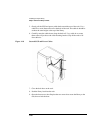
2. Turn on the power switch.
Initially SELF TEST and NOT READY, and then NOT READY and INVENTORY
CHECK alternately appear in the display window on the library. After the
power-on test completes (approximately 1.5 minutes), the drive status
information displays. (See “Understanding Display Window Messages” on
page 3-4.)
NOTE If the drive status information does not display, the power-on test was not successful
and DEVICE FAILED displays. See “Troubleshooting” on page 3-38 for
troubleshooting procedures.
3. Turn on other peripherals (if any).
4. Turn on the host system.
Install Backup Software
Follow the instructions provided with your backup software to configure it to your
library. Several trial versions are provided with the library for your evaluation.
Verify Installation With TapeAssure
HP TapeAssure is a software utility that tells you quickly and easily whether your
configuration is correct and whether the tape drive is ready for use with backup
software. Your backup software must be TapeAlert compatible for you to receive
these messages (compatible packages will display the HP TapeAlert logo). For the
latest list of backup packages that support TapeAlert, refer to HP’s World Wide
Web site (http://www.hp.com/go/tape).