


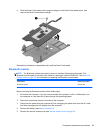
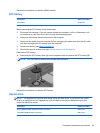

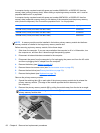

2. Remove the four Phillips PM3.0×3.0 screws that secure the upgrade bay hard drive carrier to the
computer.
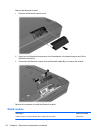
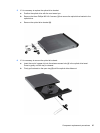
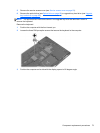
3. Loosen the 2 Phillips captive screws (1) that secure the hard drive to the carrier.
4. Insert a flat-bladed screwdriver or similar tool into the upgrade bay hard drive tab access (2) and
press the tab to the left to release the upgrade bay hard drive from the computer.
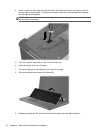
5. Lift and remove the upgrade bay hard drive (3), and then remove the hard disk drive interface
connector (4).
Reverse this procedure to reassemble and install the upgrade bay hard drive and upgrade bay hard
drive carrier.
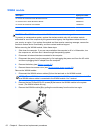
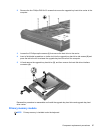
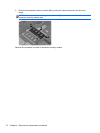
Primary memory module
NOTE: Primary memory is installed under the keyboard.
Component replacement procedures 67