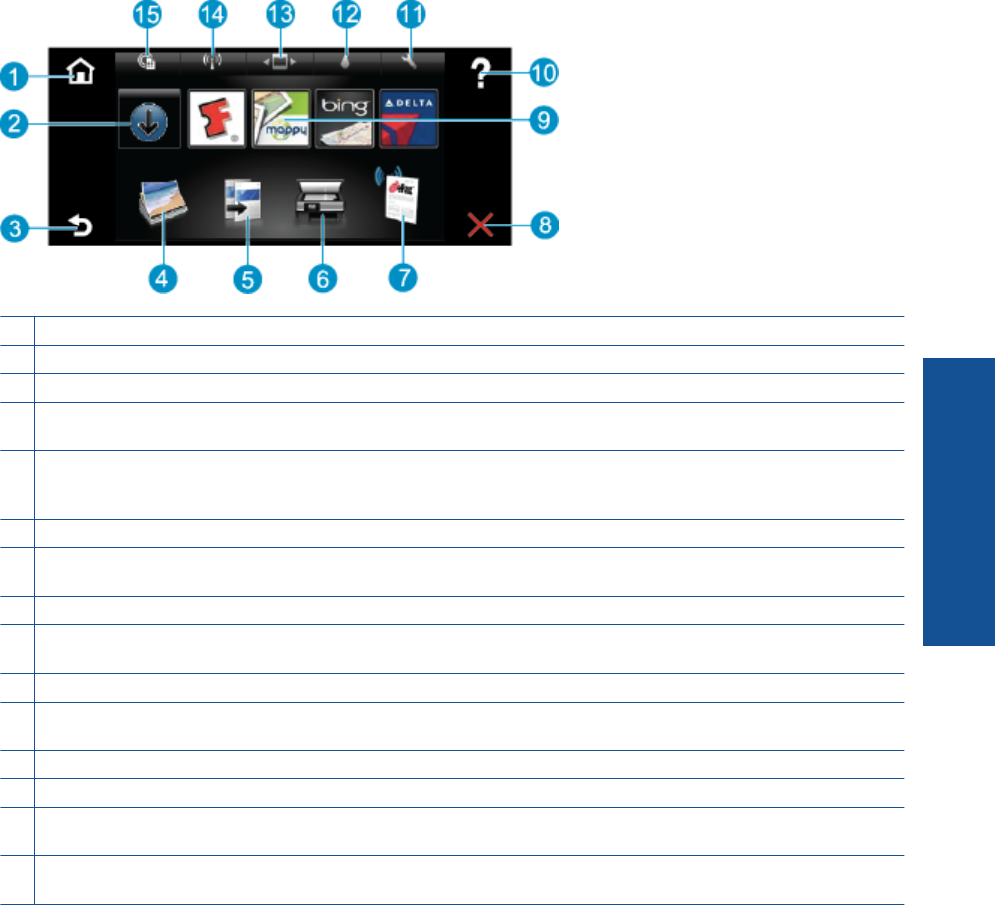
1 Home: Returns to the Home screen, the screen that is displayed when you first turn on the printer.
2 Get More: If Web Services are enabled, takes you to the Internet for downloading more Apps.
3 Back: Returns to the previous screen on the display.
4 Photo: Opens the Photo menu. From there, you can view and print photos, connect to Snapfish, reprint a printed photo,
or save photos to a USB flash drive or a memory card.
5 Copy: Opens the Copy menu where you can preview your copy, edit for size and darkness, select black or color, and
select the number of copies. You can also change settings to make 2-sided copies, or select size, quality, and paper
type.
6 Scan: Opens the Scan menu, where you can select a destination for your scan.
7 eFax: Opens the eFax internet fax service. Send and receive faxes without fax hardware or a phone line. Internet
connection and Web Services required.
8 Cancel: Stops the current operation.
9 Apps: Provide quick and easy access to pages to print from the Web, such as maps, coupons, coloring pages, puzzles,
and more.
10 Help: Shows information on the display to assist in the current operation.
11 Setup: Opens the Setup menu with a list of other menus from which you can change product settings and perform
maintenance functions. Setup menus include Network, Web, Tools, and Preferences.
12 Ink Status: Opens the Ink Status dashboard, showing estimated ink levels by cartridge.
13 Apps Manager: Opens the Apps Manager where you can manage settings or remove Apps.
14 Wireless: Opens the Wireless Menu with options for setting up a wireless connection, testing the connection, and
turning wireless on and off.
15 Web Services: Opens the Web Services menu with options for enabling or turning off Web Services and ePrint,
checking for product updates, and configuring other web settings.
Control panel features 7
Get to know the HP ENVY 110
series
