loses power. The NiMH batteries in the battery pack are continuously recharged by a
trickle-charging process whenever the system power is on.
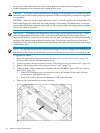
CAUTION: To prevent a server malfunction or damage to the equipment, do not add or remove
the battery pack while an array capacity expansion, RAID level migration, or stripe size migration
is in progress.
CAUTION: After the server is powered down, wait 15 seconds and then check the amber LED
before unplugging the cable from the cache module. If the amber LED blinks after 15 seconds,
do not remove the cable from the cache module. The cache module is backing up data, and data
is lost if the cable is detached.
IMPORTANT: The battery pack might have a low charge when installed. In this case, a POST
error message appears when the server is powered up, indicating that the battery pack is
temporarily disabled. No action is necessary on your part. The internal circuitry automatically
recharges the batteries and enables the battery pack. This process can take up to four hours.
During this time, the cache module functions properly, but without the performance advantage
of the battery pack.
NOTE: The data protection and the time limit also apply if a power outage occurs. When power
is restored to the system, an initialization process writes the preserved data to the hard drives.
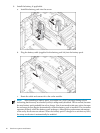
To upgrade the BBWC:
1. Close all applications and power down the server (“Power down the server” (page 31)).
This procedure flushes all data from the cache.
2. Extend or remove the server from the rack (“Extending the server from the rack” (page 31)).
3. Remove the access panel (“Removing the access panel” (page 32)).
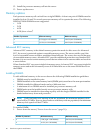
4. If the existing cache is connected to a battery, observe the BBWC Status LED, see “Battery
pack LEDs” (page 20).
• If the LED is blinking every two seconds, data is still trapped in the cache. Restore
system power, and repeat steps 1–3.
• If the LED is not lit, disconnect the battery cable from the cache.
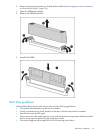
5. Remove the cache module from the controller.
54 Hardware options installations


