


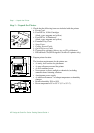


Step 10 – Install Additional Memory
HP DesignJet ColorPro Series: Getting Started Guide 12
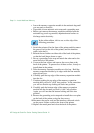
• Leave the memory expansion module in the antistatic bag until
you are ready to install it.
• If possible, use an antistatic wrist strap and a grounding mat.
• Before you remove the memory expansion module from the
antistatic bag, touch a grounded, unpainted metal surface to
discharge static electricity.
In the online edition, click to see a video clip of the
following procedure:
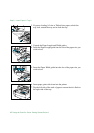
1. Switch the printer off at the front of the printer and disconnect
the power cord (at the side of the printer) and the interface
cable (at the back).
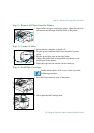
2. Release the two latches on either side of the back of the printer,
so that the back hinges down to open.
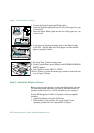
3. Put on a grounding wrist strap and attach the other end to the
metal chassis of the printer.
4. Unscrew the four screws and remove the cover plate at the
back of the printer. To prevent loss of these screws, loosely re-
install them in the printer.
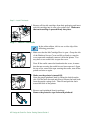
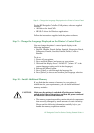
5. Take the memory expansion module out of its bag. Hold the
memory expansion module by its edges with the non-metallic
edges toward you.
6. Carefully push the top edge of the memory expansion module
into the slot.
7. Continue pushing the top edge of the memory expansion
module until you feel it “click” into position. At the same time
you will see that the top locking tab locks into position.
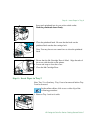
8. Carefully push the bottom edge of the memory expansion
module into the slot until you feel it “click” into position.
Again, you will see that the bottom locking tab locks into
position.
9. Remove the grounding wrist strap and re-install the cover plate
on the back of the printer, using the four screws.
10.Reconnect the power cord and the interface cable and switch
on the power isolator switch at the front of the printer.
11.Replace the metal panel and close the back of the printer.