


Setup for stand-alone fax
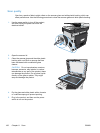
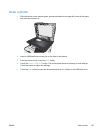
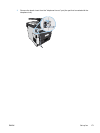
1. Unpack and set up the product.
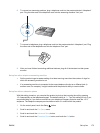
2.
From the Home screen, touch the Setup
button.
3. Touch the Fax Setup menu.
4. Touch the Fax Set-Up Utility button.
5. Follow the on-screen prompts and select the appropriate response for each question.
NOTE: The maximum number of characters for the fax number is 20.
NOTE: The maximum number of characters for the fax header is 25.
Configure fax settings
You can configure the product fax settings from the control panel, the Fax Setup Wizard (if the
software is installed), HP Device Toolbox (if the software is installed), or from the HP Embedded Web
Server (if the product is connected to a network).
In the United States and many other countries/regions, setting the time, date, and other fax header
information is a legal requirement.
Use the control panel to set the fax time, date, and header
To use the control panel to set the date, time, and header, complete the following steps:
1.
From the Home screen, touch the Setup
button.
2. Touch the Fax Setup menu.
3. Touch the Basic Setup menu.
4. Scroll to and touch the Time/Date button.
5. Select the 12-hour clock or 24-hour clock.
6. Use the keypad to enter the current time, and then touch the OK button.
7. Select the date format.
8. Use the keypad to enter the current date, and then touch the OK button.
9. Touch the Fax Header menu.
10. Use the keypad to enter your fax number, and then touch the OK button.
NOTE: The maximum number of characters for the fax number is 20.
11. Use the keypad to enter your company name or header, and then touch the OK button.
NOTE: The maximum number of characters for the fax header is 25.
174 Chapter 12 Fax ENWW