Configure trays
The product automatically prompts you to configure a tray for type and size in the following situations:
●
When you load paper into the tray
●
When you specify a particular tray or paper type for a print job through the printer driver or a
software program and the tray is not configured to match the print-job’s settings
NOTE: The prompt does not appear if you are printing from Tray 1, and it is configured for the Any
Size paper size and the Any Type paper type settings. In this situation, if the print job does not
specify a tray, the product prints from Tray 1, even if the paper size and type settings in the print job
do not match the paper loaded in Tray 1.
Configure a tray when loading paper
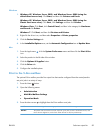
1. Load paper in the tray. Close the tray if you are using a tray other than Tray 1.
2. The tray configuration message appears.
3. Press the OK button to accept the detected size. Or, press the back arrow
to choose a different
configuration, and continue with the following steps.
4. To modify the tray configuration, press the down arrow
to highlight the correct size, and then
press the OK button.
NOTE: The product automatically detects most paper sizes in trays other than Tray 1.
5. Press the down arrow to highlight the correct type, and then press the OK button.
Configure a tray to match print job settings
1. In the software program, specify the source tray, the paper size, and the paper type.
2. Send the job to the product.
If the tray needs to be configured, a prompt appears on the control-panel display.
3. If the displayed size is not correct, press the back arrow
. Press the down arrow to highlight
the correct size, or highlight the Custom option.
To specify a custom size, first press the down arrow
to highlight the correct unit of measure.
Then set the X and Y dimensions by using the numeric keypad or by pressing the up arrow
or
the down arrow
.
4. If the displayed paper type is not correct, press the back arrow
, and then press the down arrow
to highlight the paper type.
ENWW
Configure trays
85


