


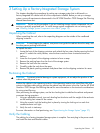
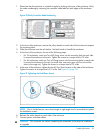
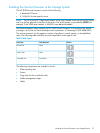
1. Determine that the enclosure is oriented correctly by looking at the rear of the enclosure. Verify
the node numbering by reviewing the controller node label on both edges of the enclosure
slot.
Figure 20 Verify Controller Node Numbering
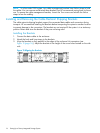
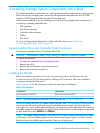
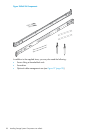
2. At the front of the enclosure, remove the yellow bezels on each side of the enclosure to expose
the mounting holes.
3. Slide the enclosure onto the rail shelves. Use both hands to handle the enclosure.
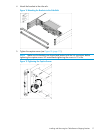
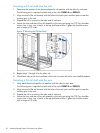
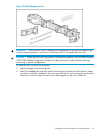
4. At the front of the enclosure, do one of the following steps:
• For 2U enclosures, insert one Torx M5 (long) screw into the mounting hole on each side
to secure the enclosure to the rack. Tighten the screws to a torque level of 13 in-lbs.
• For 4U enclosures, insert two Torx M5 (long) screws into the mounting holes on each side
to secure the enclosure to the rack (on each side, one screw goes into the rail and the
other to the cage nut). Tighten the screws to a torque level of 13 in-lbs.
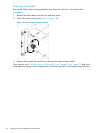
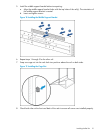
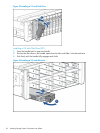
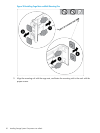
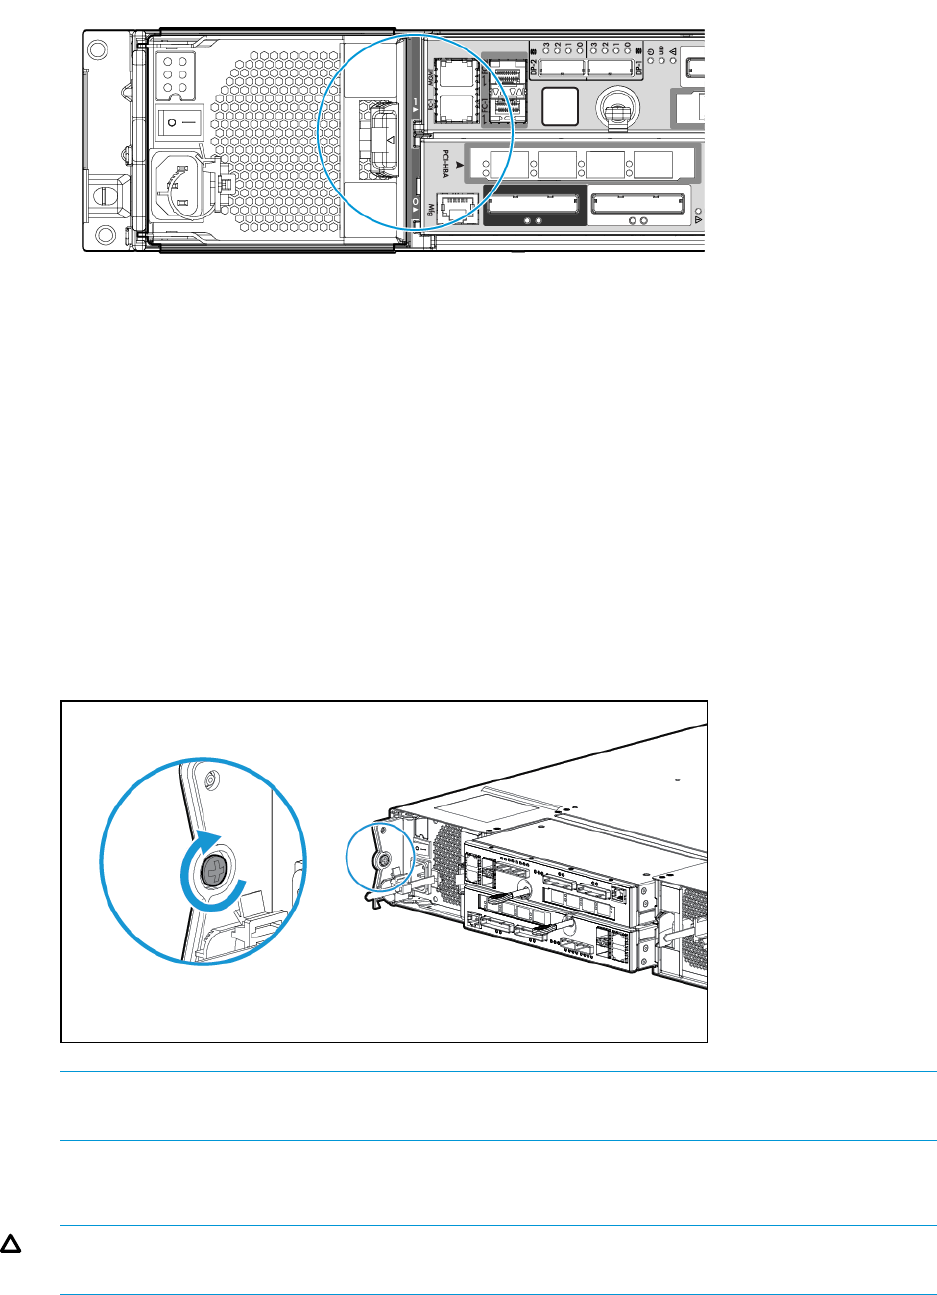
5. At the rear of the enclosure, tighten the two M5 Torx (short) screws on the sides of the enclosure.
Tighten the screws to a torque level of 13 in-lbs. See Figure 21 (page 23).
Figure 21 Tightening the Hold-Down Screw
NOTE: Due to limited access, use a short length or right angle torx bit screwdriver to tighten
the hold-down screws.
6. Reinsert the yellow bezels on each side of the enclosure.
7. Connect power and data cables.
CAUTION: Do not power on without completing the remainder of the physical installation
or upgrade.
Installing Enclosures 23