


2-20
Installing the Switch
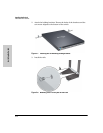
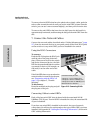
Installation Procedures
Installing the Switch
Terminal Configuration
To connect a console to the switch, configure the PC terminal emulator as a
DEC VT-100 (ANSI) terminal or use a VT-100 terminal, and configure either
one to operate with these settings:
■ any baud rate from 1200 to 115200 (the switch senses the speed)
■ 8 data bits, 1 stop bit, no parity, and flow control set to Xon/Xoff
■ for the Windows Terminal program, also disable (uncheck) the “Use
Function, Arrow, and C
trl Keys for Windows” option
■ for the Hilgraeve HyperTerminal program, select the “Terminal keys”
option for the “Function, Arrow, and C
trl Keys act as” parameter
If you want to operate the console using a different configuration, make sure
you change the settings on both the terminal and on the switch so they are
compatible. Change the switch settings first, save your changes, then change
the terminal settings, then reboot the switch and reestablish the console
session.
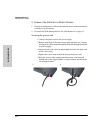
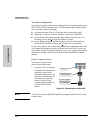
Direct Console Access
To connect a console to the
switch, follow these steps:
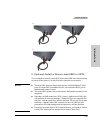
1. Connect the PC or terminal
to the switch’s Console Port
using the console cable
included with the Switch. (If
your PC or terminal has a 25-
pin serial connector, first
attach a 9-pin to 25-pin
straight-through adapter at
one end of the console
cable.)
Note The ProCurve Switch 6600-24XG (J9265A) is shipped with an RJ-45 to 9-pin
console cable.
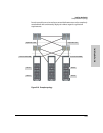
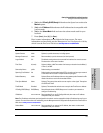
Figure 2-15. Connecting the console cable
PC running a terminal
emulator program, or
a VT-100 terminal
Console port
Console cable supplied
with the switch