Connecting to USB and Optional Ethernet Ports
An optional Ethernet port and different types of external USB ports are available via a dongle cable attached to the port labeled
“ETHERNET/USB”, located on the bottom of the VX6. If the Ethernet option is not ordered, the Ethernet connector on the
dongle cable has no function.
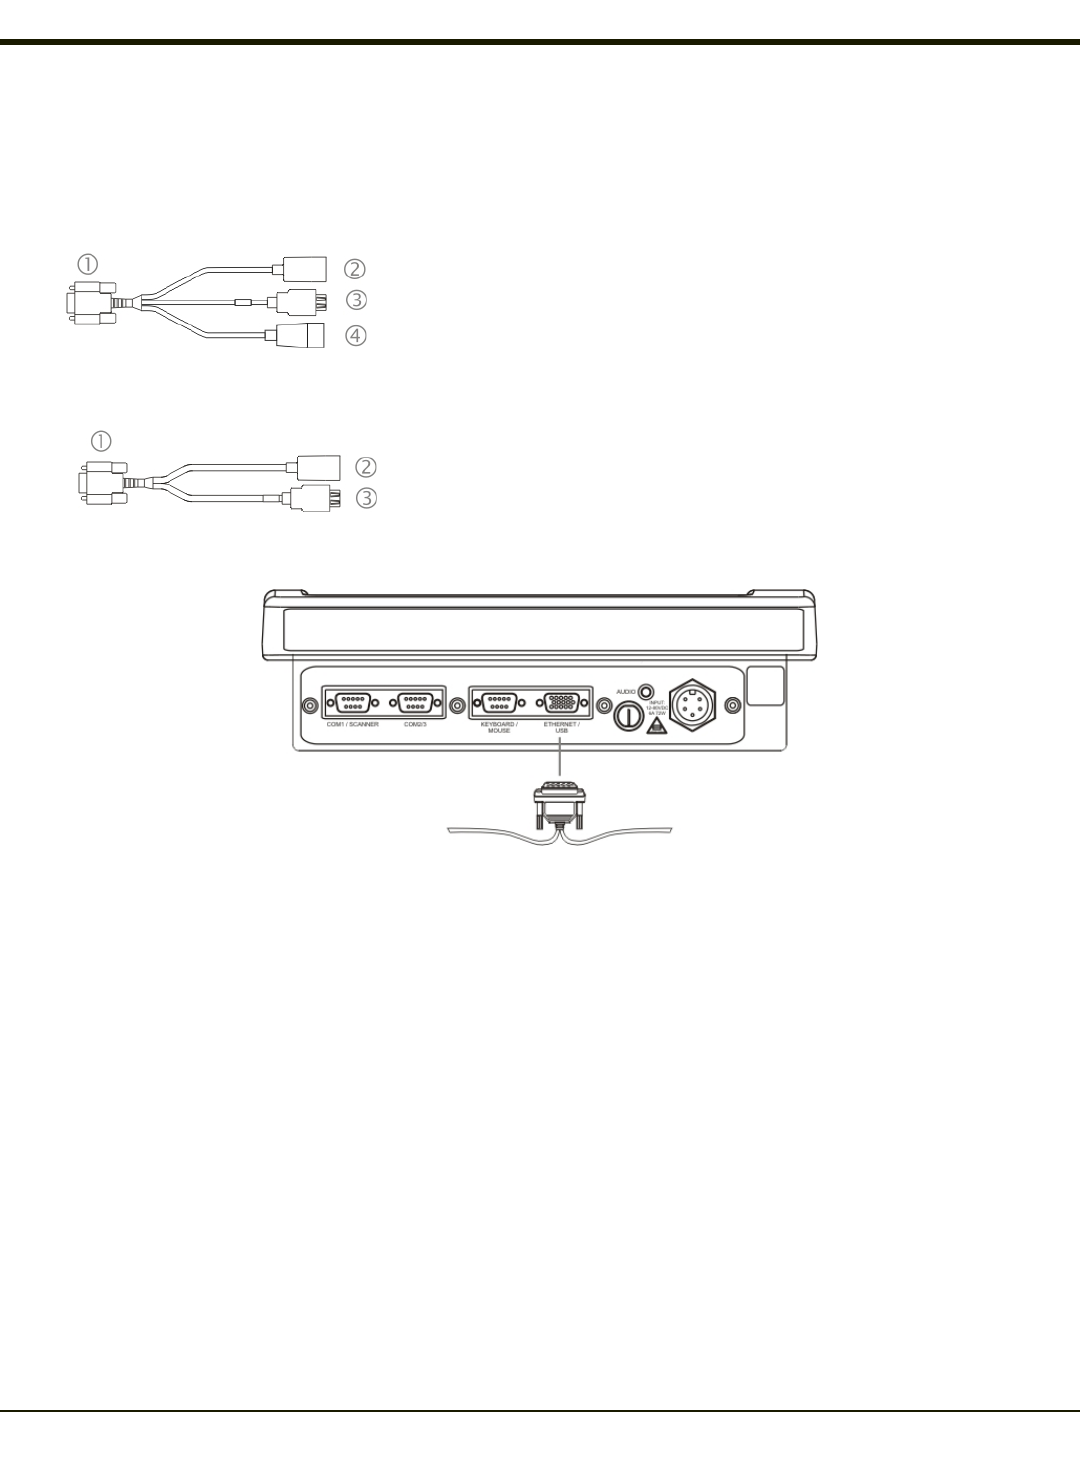
9000075CABLE
1. D15 Connector
2. RJ45 Connector
3. USB-Client Connector (for connecting to a USB host or hub)
4. USB-Host Connector (for connecting to a USB device)
9000052CABLE
1. D15 Connector
2. RJ45 Connector
3. USB-Host Connector (for connecting to a USB device)
Note: D15 to Ethernet / USB Host cable shown.
1. Power off the VX6 before connecting the D15 connector to the VX6.
2. Insert the D15 end of the Ethernet / USB dongle cable into the VX6 USB connector. Seat the connector firmly over the
pins and turn the thumbscrews in a clockwise direction. Do not over tighten.
3. Use a strain relief clamp to secure the dongle cable.
4. The VX6 may be powered On any time after the D15 connector has been secured to the VX6.
5. To connect a USB device to the VX6: Plug the desired device, such as a USB mouse or external drive, into the USB
Host port on the dongle cable . USB devices may be connected/ disconnected without turning off the VX6.
6. To connect the VX6 to a PC: Requires a commercially available USB cable with a type A plug on one end and a type B
plug on the other end. Connect this cable to the USB Client port on the dongle cable and to a USB Host port on a PC.
7. To connect the optional network connection: Connect an Ethernet cable into the Adapter cable. Insert the network cable
and ensure it is firmly seated in the connector jack.
8. To remove the Ethernet cable, press the release tab on the cable end.
Note: The USB port may be used to connect a USB mouse to the VX6, however the mouse pointer may not always be
visible. The mouse pointer reappears on the touch screen when the pointing device is moved.
3-2


