


6
4. Click Management, under I/O Module Tasks, in the left-hand navigation tree. An I/O Module
Management heading appears in the display.
5. Click the link of the physical bay that holds the Server Switch Module that you want to configure.
A Bay X heading appears, where X is the number of the bay.
6. Enter an IP address, in the IP address field of the New Static IP Configuration section, for the
Server Switch Module.
NOTE: The IP address of the Server Switch Module must fall in the same subnet as the modules in
the other bays.
7. Enter a subnet mask, in the Subnet mask field of the New Static IP Configuration section, for the
Server Switch Module.
NOTE: The subnet mask of the Server Switch Module must match the subnet mask of the modules
in the other bays.
8. Enter a gateway IP address, in the Gateway address field of the New Static IP Configuration
section, for the Server Switch Module, then click the Save button.
NOTE: The gateway address of the Server Switch Module must match the gateway address of the
modules in the other bays.
9. Open a telnet session to the Server Switch Module with the IP address that you configured in step 6
and log in to your Server Switch Module, then proceed to “Change the Default Password” to secure
your Server Switch Module. Log in with the default user name of USERID and password of
PASSW0RD, where the 0 in PASSW0RD is a zero.
Example
Change the Default Password
Change the default password immediately to secure your Server Switch. To change the default
administrative password, perform the following steps:
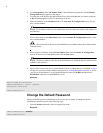
1. Enter the
enable
command to enter Privileged Exec mode.
Example
Switch(IBM BladeCenter)
IBM BladeCenter login: USERID
Password: xxxxxxxx
IBM BladeCenter>
IBM BladeCenter> enable
IBM BladeCenter#