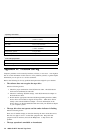
when your cleaning cartridge expires, make a notation on the cleaning cartridge each
time you clean the tape drive.
Appendix B. Power-on self-test (POST)
sequence
When the 40/80 GB DLT Internal Tape Drive is first turned on and there is no
cartridge loaded, the indicators on the front panel light in the following sequence:
1. Each of the device status indicators on the right side lights briefly, starting from
top to bottom.
2. All of the indicators on the left side turn on at the same time and remain lit for
three seconds before turning off.
3. The Operate Handle, Write Protect, and Use Cleaning Tape indicators turn off.
4. The Tape in Use indicator blinks while the drive initializes.
5. Then one of the following sequences occur:
If a tape is not loaded:
a. The Tape in Use indicator turns off.
b. The Operate Handle indicator turns on.
c. The Cartridge Insert/Release handle unlatches.
d. The beeper sounds.
If a tape is loaded:
a. The drive loads the tape.
b. The Tape in Use indicator stops blinking and stays on.
c. The indicator showing the tape’s current capacity lights. (No lights
indicate the tape is blank. If you do not select a capacity, the default
capacity is used.)
d. The Density Override indicator blinks.
Attention: If you turn on the drive with a tape inserted and the handle unlatched,
you might damage the tape or drive.
If a cartridge is loaded, but the Cartridge Release/Insert handle is up:
a. The Tape in Use indicator turns off.
b. The Operate Handle indicator flashes.
c. You must lower the handle to load the cartridge.
If the Cartridge Release/Insert handle is up with no cartridge inserted:
a. The Operate Handle indicator flashes.
b. Push the Cartridge Release/Insert handle down.
c. Wait for the Operate Handle indicator to light steadily.
If the drive detects an error condition:
a. The indicators on the right or left flash repeatedly in unison.
b. Press the Unload button and wait for the drive to reinitialize.
c. If the drive does not reset, turn it off, then on.
2-2 40/80 GB DLT Internal Tape Drive


