


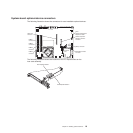

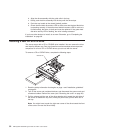

Adapter
Adapter
bracket
Expansion-slot
bracket
Tab
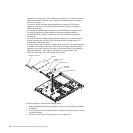
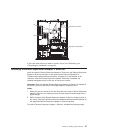
Important: Make sure that the U-shaped opening in the metal adapter bracket
engages the tab on the expansion-slot bracket.
10. Follow the cabling instructions, if any, that come with the adapter.
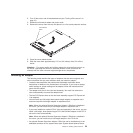
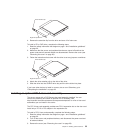
11. Carefully align the riser-card assembly with the guides on the rear of the server
and with the riser-card connectors on the system board; then, press down on
the assembly. Make sure that the riser-card assembly is fully seated in the
riser-card connector on the system board.
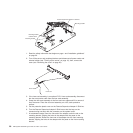
PCI-X slot
Power cable
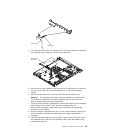
12. If the riser-card assembly is an optional PCI-X riser-card assembly in the
server, reconnect the riser-card power cable to the riser-card assembly.
13. If you are installing a ServeRAID-MR10i controller (2.5-inch drive models only),
complete the following steps:
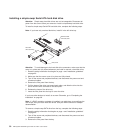
a. Disconnect the existing SAS/SATA controller signal cable from the hard
disk drive backplane and from the controller; then, remove the cable from
the server.
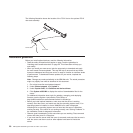
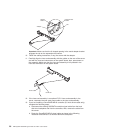
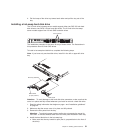
b. Route the ServeRAID-MR10i signal cable as shown in the following
illustration and connect it to the hard disk drive backplane.
26 IBM System x3250 M2 Types 4190 and 4194: User’s Guide