


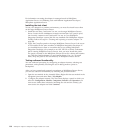
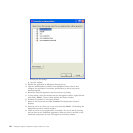
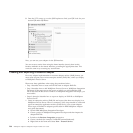

8. Once the UTC comes up, use the JNDI explorer to find your EJB. Look for your
session EJB under EJB Beans.
Now, you can test your adapter via the EJB interface.
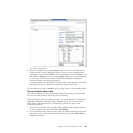
You can create a session bean using the home interface (create), then invoke
business methods on the remote interface, providing the appropriate data. This
works the same way as testing any session bean.
Creating and exporting a resource adapter
For every adapter implementation in resource adapter archive (RAR) format, you
must create (export) one or more enterprise archive (EAR) files, which you deploy
to WebSphere Process Server.
Please note these guidelines when using the procedures below:
v Step 1 describes how to create an EAR file from an adapter RAR file.
v Step 2 describes how to add WebSphere Process Server to WebSphere Integration
Developer. If the target server–the server on which you will install the EAR
file–is not listed in the Servers window of WebSphere Integration Developer, you
must add it.
v Steps 3 through 6 describe how to export or deploy an EAR file to WebSphere
Process Server.
1. Create an enterprise archive (EAR) file and export (also known as deploy) it to
WebSphere Process Server. Here is a summary of the steps needed to create and
export an enterprise application archive (EAR) file for your custom adapter.
These steps are defined in adapter-specific detail in IBM WebSphere Adapter
user guide documents.
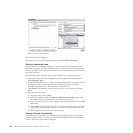
a. Launch IBM WebSphere Integration Developer.
b. Create a project in WebSphere Integration Developer and then import the
adapter RAR file.
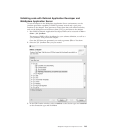
c. Switch to the Business Integration perspective.
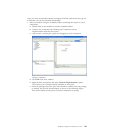
d. Create a module (for example, TwineballCustomerOutbound).
e. Right-click on the frame and select New → External Service.
206 WebSphere Adapters: WebSphere Adapter Toolkit User Guide