


Note: External service discovery is equivalent to enterprise metadata discovery.
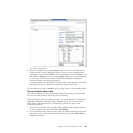
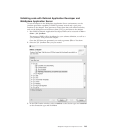
f. Select the appropriate external service.
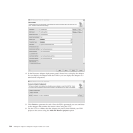
g. Specify the connection properties, metadata, and service functions.
h. On the Saving Properties pane, save the properties to the module you
created in Step d.
i. Save the file.
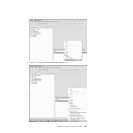
2. Add the target server to WebSphere Integration Developer.
Note: If you have not done so, you must add the target server–WebSphere
Process Server–to WebSphere Integration Developer. You must do this before
you can export your adapter EAR file for runtime testing.
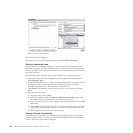
a. Right-click in the Servers window and select New → Server from the menu.
b. On the next panel, specify the hostname Note that the workstation can run
any operating system (Windows, Solaris, AIX, and so on) that supports
WebSphere Process Server.
c. Click Next to display the WebSphere Server Settings panel. You can also
click Detect to verify that WebSphere Process Server is installed on the
machine.
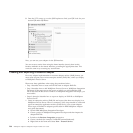
d. (Optional) Start WebSphere Process Server. Right-click the target WebSphere
Process Server in the Servers window and select Start from the menu.
e. (Optional) Start the administrative console. Right-click the target WebSphere
Process Server in the Servers window and select Run administrative
console from the menu.
3. Export and deploy an EAR file.
a. In the J2EE Perspective, right-click the adapter EAR file.
b. Select Export → EAR file from the pop-up menu.
c. When prompted, specify the filename where the EAR is to be saved.
4. Start the target IBM WebSphere Process Server.
5. Start the administration console on that server.
6. Install the adapter EAR file on the target WebSphere Process Server.
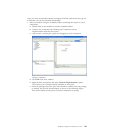
a. After the administrative console completes its startup on the target server,
log in and navigate to Applications → Enterprise Applications. Click
Install.
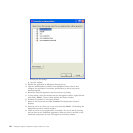
b. Select the EAR file that you exported previously. Follow the screens,
clicking Next and eventuallyFinish. Ensure that the EAR has been deployed
successfully and save the configuration by clicking on the Save to Master
Configuration link and following the prompts.
c. Start the application.
Select the application and click Start. The status should change from a red X
to a green arrow.
d. Ensure that the types in the WSDL are correct.
Switch to the Resources perspective, right-click the WSDL file and open the
Interface Editor. Examine the values in the Type column and ensure that
these are correct. Usually, the type is a BusinessGraph.
e. Publish the artifacts to WebSphere Process Server. Right-click WebSphere
Process Server and click Publish.
f. Examine the Console window to ensure that your module has been
successfully deployed to the server.
WebSphere Adapter development overview 207