


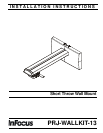


PRJ-WALLKIT-13 Installation Instructions
6
Visit the InFocus support site at www.infocus.com/support
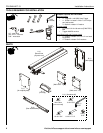
ASSEMBLY AND INSTALLATION
The PRJ-WALLKIT-13 short throw projector mount is designed
to be mounted to solid concrete, hollow concrete block, 2" x 4"
wood studs (16" on center), or steel studs (16" on center).
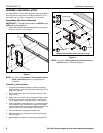
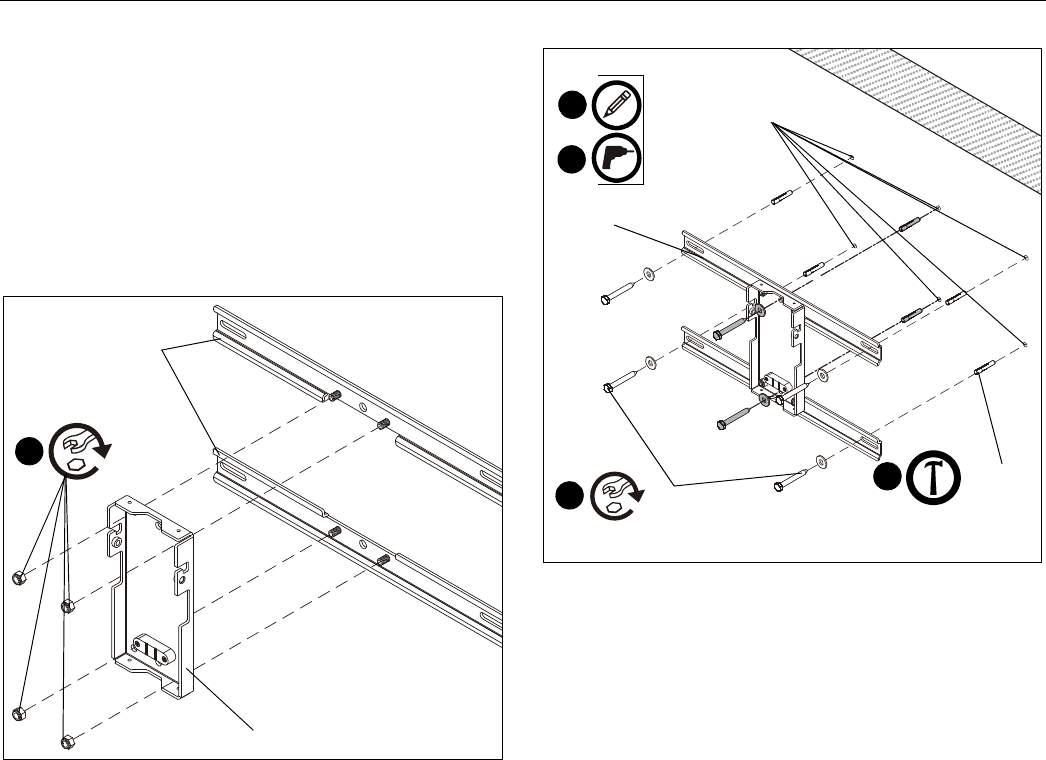
Assembling Wall Plate to Brackets
IMPORTANT ! : This step must be taken for BOTH single
AND dual stud installations!
1. Attach wall plate (B) to two dual stud brackets (G) using four
5/16" lock nuts (HF). (See Figure 1)
Figure 1
NOTE:
Proceed to the Concrete or Concrete Block, Wood
Studs or Steel Studs section, as appropriate for
installation.
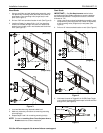
Concrete or Concrete Block
1. Using wall plate/bracket assembly, mark four mounting
holes (dual stud), or two mounting holes (single stud) in wall
plate. (See Figure 2)
2. Drill one 3/8" hole at one of the marked locations in wall.
(See Figure 2)
3. Install either one Fischer UX 10 x 60 anchor [Part number
077871] (not included) or one Hilti HUD-L 10x70 anchor
(not included) into one of the drilled holes. (See Figure 2)
4. Install one Grade 2 or better 5/16 x 2-1/2" hex head lag screw
(not included) through one Grade 2 or better 5/16" washer
(not included), one mounting hole in wall bracket and into one
Fischer or Hilti anchor (not included). (See Figure 2)
5. Level wall bracket using attached bubble level.
6. Make any necessary corrections to remaining mounting
hole marking(s).
7. Repeat Steps 2 through 4 for remaining mounting hole(s).
Figure 2
NOTE:
Proceed to Installing Short Throw Projector Arm to
Bracket section to continue installation.
(B)
(G)
1
(HF) x 4
1
2
3
anchors
4
fasteners
(G)
x 4 (dual stud)
x 2 (single stud)
(Single stud fasteners/anchors shown in gray)