


PRJ-WALLKIT-13 Installation Instructions
8
Visit the InFocus support site at www.infocus.com/support
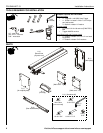
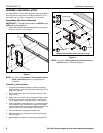
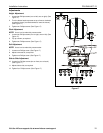
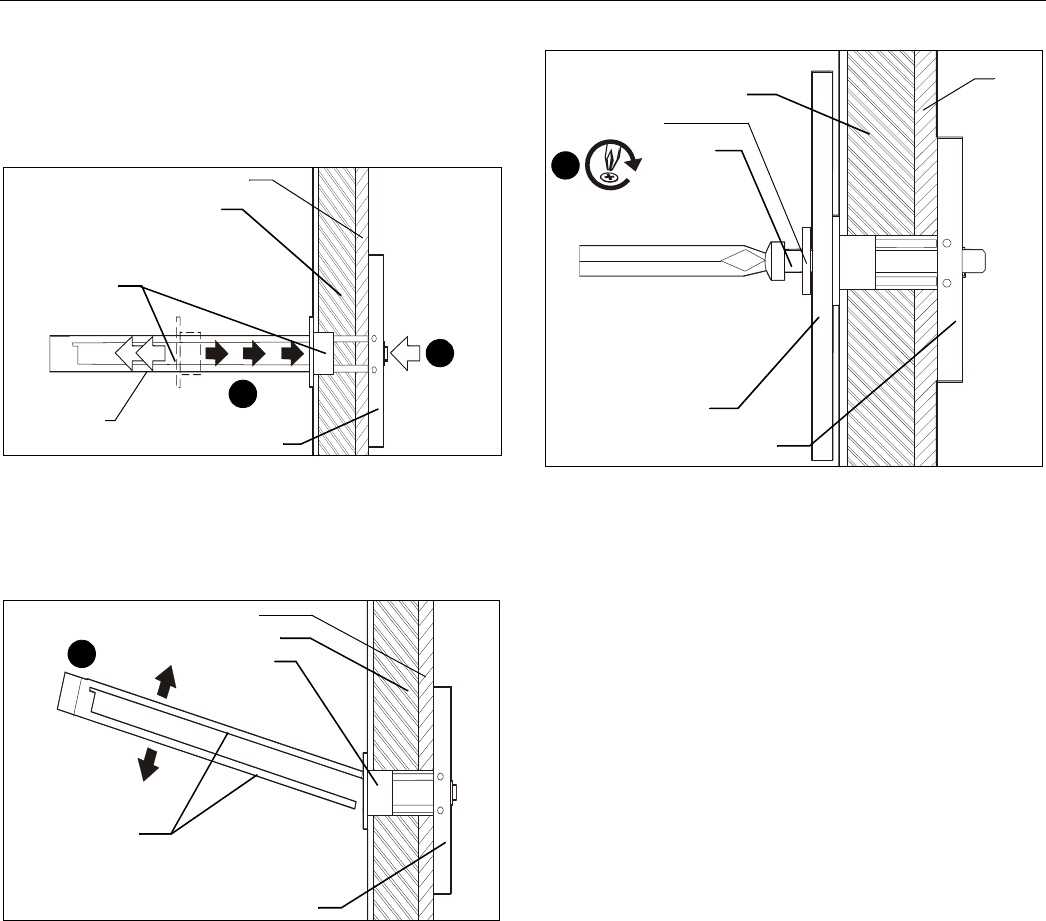
4. Holding plastic straps on anchor, pull anchor away from wall
until channel rests flush behind wall making sure anchor
channel is positioned vertically on stud. (See Figure 6)
5. Slide plastic cap on anchor towards wall until flange of cap
is flush with wall. (See Figure 6)
Figure 6
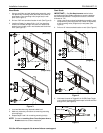
6. Snap off plastic straps on anchor at wall by pushing side to
side, snapping off straps level with flange of plastic cap.
(See Figure 7)
Figure 7
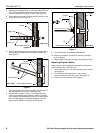
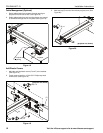
7. Place wall bracket over anchor and align mounting hole in
wall bracket with hole in anchor. (See Figure 8)
8. Insert Grade 2 or better 1/4-20 x 1-3/4" Phillips pan head
screw (not included) through Grade 2 or better 1/4" washer
(not included), corresponding mounting hole on wall bracket
and into Snap-Toggle (not included) and tighten until flush
against mount. DO NOT overtighten! (See Figure 8)
Figure 8
9. Level wall bracket using attached bubble level.
10. Make any necessary corrections to remaining mounting
hole marking(s).
11. Repeat Steps 2 through 8 for remaining mounting hole(s).
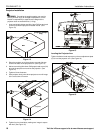
Adjusting Projector Mount
Lower projector mount [attached to short throw projector arm
(A)] to lowest position. (See Figure 9)
1. Loosen two screws (one on each side of projector mount).
(See Figure 9)
2. Turn the button head cap screw on top of mount
counterclockwise to lower the mount. (See Figure 9)
3. Loosen four hex head bolts. (See Figure 9)
anchor x 4
Plastic Cap
Drywall
Anchor Metal Channel
5
Steel Stud
4
(side view)
Plastic Straps
Drywall
Anchor Metal Channel
Plastic Cap
6
Steel Stud
(side view)
Drywall
Anchor Metal Channel
(G)
x 4
10
x 4
(side view)
Steel
stud