


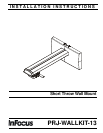


Installation Instructions PRJ-WALLKIT-13
Visit the InFocus support site at www.infocus.com/support 7
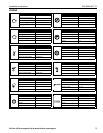
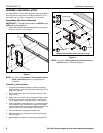
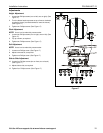
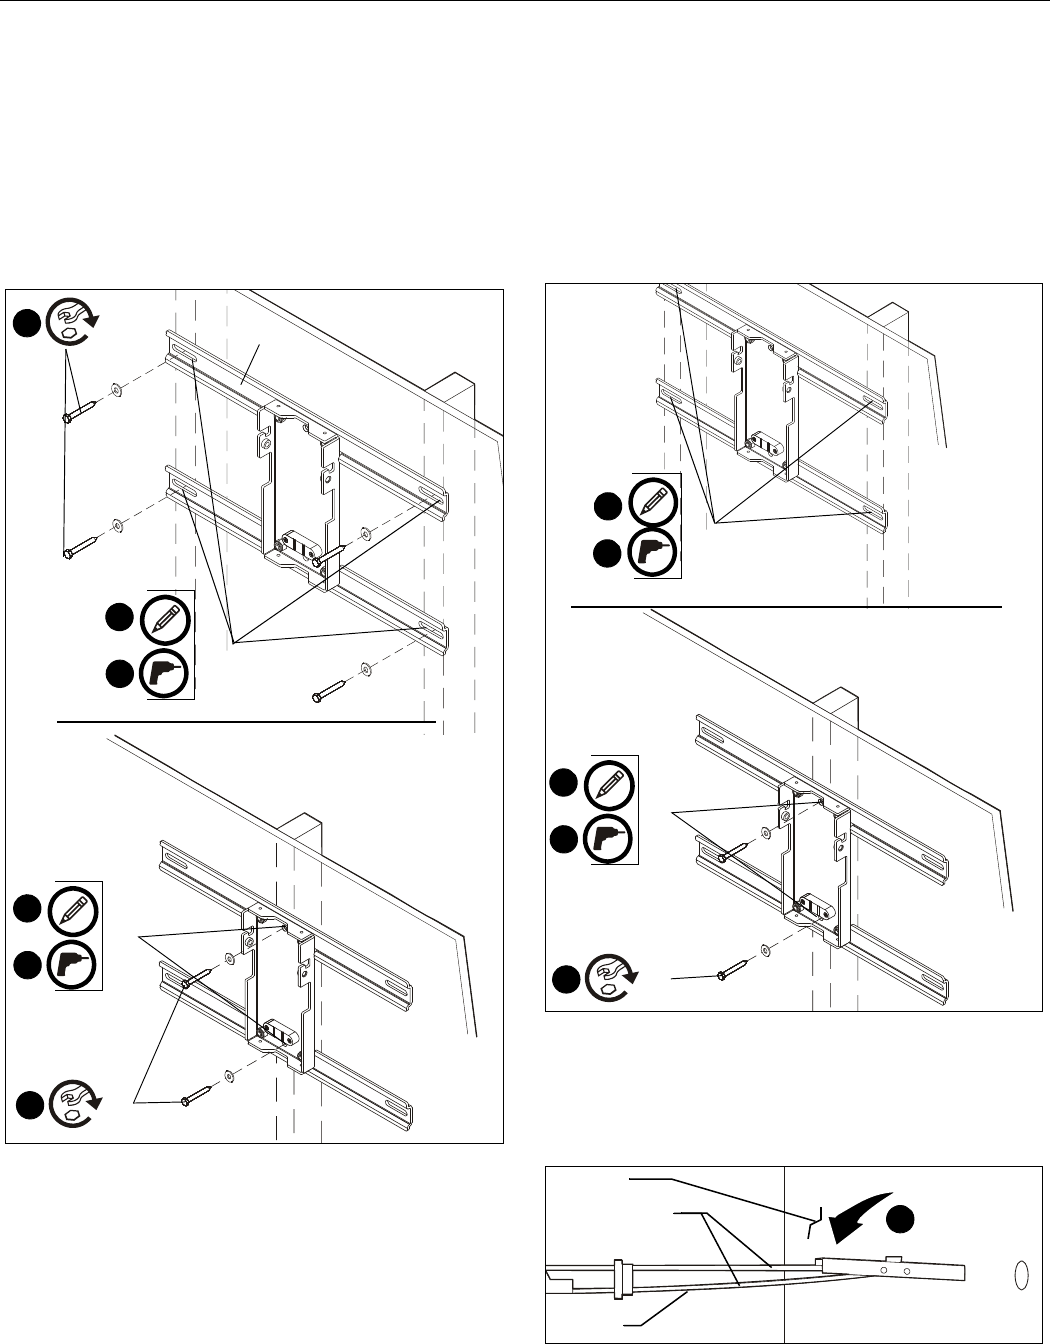
Wood Studs
1. Using a stud finder and wall plate/bracket assembly, mark
four preliminary mounting holes (dual stud) over center of
wood studs, or two mounting holes (single stud) in wall
plate. (See Figure 3)
2. Drill one 7/32" hole at marked location in wall. (See Figure 3)
3. Install one Grade 2 or better 5/16 x 2-1/2" hex head lag
screw (not included) through one Grade 2 or better 5/16"
washer (not included), hole in wall bracket and into drilled
hole. (See Figure 3)
Figure 3
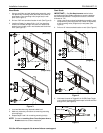
4. Level wall bracket using attached bubble level.
5. Make any necessary corrections to remaining mounting
hole marking(s).
6. Repeat Steps 2 and 3 for remaining mounting hole(s).
NOTE: Proceed to Installing Short Throw Projector Arm to
Bracket section to continue installation.
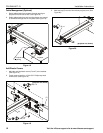
Steel Studs
IMPORTANT ! :
See Site Requirements section before
proceeding with Steel Studs installation to ensure installation
site meets requirements! The drywall must have a minimum
thickness of 1/2"!
1. Using a stud finder and wall plate/bracket assembly, mark
four preliminary mounting holes over center of steel studs,
or two mounting holes (single stud) in wall plate. (See
Figure 4)
2. Drill one 1/2" hole at marked location on wall. (See Figure 4)
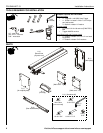
Figure 4
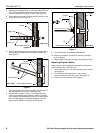
3. Hold metal channel on
Toggler® 1/4-20 (BB) Snap-Toggle
(not included) flat alongside plastic straps and slide channel
through hole. (See Figure 5)
Figure 5
1
2
x 4
(G)
3
x 4
(Dual stud)
(Single stud)
1
2
x 2
3
x 2
1
2
x 4
(Single stud)
1
2
x 2
3
x 2
(Dual stud)
x 4
Drywall
Plastic Straps
3