


Chapter 2: Installation
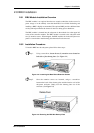
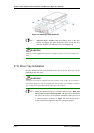
Figure 2-5: Front View of an Individual Drive Tray
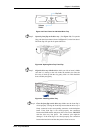
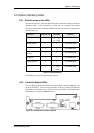
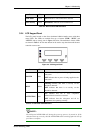
Step 2. Open the front flap on the drive tray. (See Figure 2-6). To open the
flap, push the release button (shown in Figure 2-7) on the front bezel.
The front flap will open in an upward direction.
Figure 2-6: Opening Drive Tray Front Flap
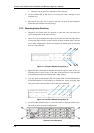
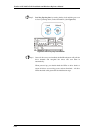
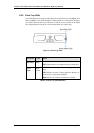
Step 3. Align the drive tray with the slot in which you wish to insert it. Make
sure that it is resting on the rails inside the module slot. Once the
drive tray is lined up with the slot, gently slide it in. This should be
done smoothly and gently.
Figure 2-7: Installing a Drive Tray
Step 4. Close the front flap on the drive tray. Make sure the front flap is
closed properly. Closing the front flap ensures that the drive tray is
firmly connected to the corresponding connector on the backplane
board. If the front flap is not closed properly, the connection
between the HDD and the subsystem will not be secure. DO NOT
slam the drive tray into place! The connector pins might be
damaged. If the front flap is not closed properly, the connection
between the hard drive and the subsystem will not be secure.
Drive Tray Installation
2-13