12
Manually Configuring for Full Duplex
If your switch supports auto-negotiation with the N-way standard, duplex
configuration is automatic and no action is required on your part. However,
few switches in the current installed base support auto-negotiation. Check
with your network system administrator to verify. Most installations will
require manual configuration to change to full duplex.
Configuration is specific to the driver you’re loading for your network
operating system (NOS), as shown in the following paragraphs.
To set up the duplex mode, refer to the section below that corresponds to your
operating system.
Adapter performance may suffer or your adapter may not operate
if your hub does not support full duplex and you configure the
adapter to full duplex. Leave the adapter on half duplex if you are
not sure what type of hub you are connected to.
DOS ODI, NDIS 2.01 Clients
Edit the NET.CFG or PROTOCOL.INI file. Add to Link Driver section:
FORCEDUPLEX 2
SPEED 100 (or 10 if 10BASE-T)
NetWare server
In AUTOEXEC.NCF, Load E100B.LAN and add the following statement
(you must include the equal sign for servers):
FORCEDUPLEX=2
SPEED=100 (or 10 if 10BASE-T)
For more information, see the README file for NetWare servers.
Windows NT
While running Windows NT:
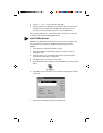
1 From the Control Panel, double-click the Intel PROSet icon.
2 PROSet examines your system and displays the Adapter Setup
window.
If you have multiple adapters, click the “Show All Adapters” box
and then select the adapter you are configuring (you can identify it
by its Ethernet address). Each adapter must be configured
separately. See page 11, Installing Multiple Adapters, for more
information.
3 From the window that appears, click Change.
4 From the Adapter Setup window, click the menu for Network Speed.
NOTE:


