7
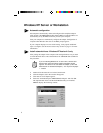
PROSet is an enhanced utility that you can use to easily configure and
test your adapter in Windows NT. PROSet also displays the computer
resources that were assigned to each PRO adapter installed.
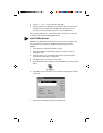
5 Click OK in the main PROSet window to return to Windows NT.
6 The Intel adapter now appears as the “Intel 82557-based 10/100 Ethernet
Adapter” on the list in the Network window. Click Close to finish.
7 Restart Windows NT when prompted.
To install multiple adapters, repeat this procedure for each new adapter. See
page 11 for specific information.
To run the PROSet software at any time, double-click the Intel
PROSet icon in the Control Panel or click the Adapter Properties
button.
Install network drivers - Windows NT Version 3.5x only.
After putting the adapter in the computer and starting Windows NT, you need
to install the Intel drivers and test the adapter.
1 Double-click the Network icon in the Control Panel.
2 Click Add Adapter.
3 When the list of adapters appears, scroll to the end of the list and select
<Other> Requires disk from manufacturer.
4 Insert the Intel Configuration and Drivers disk in the A: drive and click
OK. Drivers and the Intel PROSet utility are installed and PROSet starts.
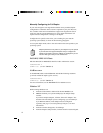
PROSet is an enhanced utility that you can use to easily configure and
test your adapter in Windows NT. PROSet also displays the computer
resources that were assigned to each PRO adapter installed. The PROSet
main window is shown on the preceding page.
5 Click OK in the PROSet main window to return to Windows NT.
6 Click OK in the Network Settings dialog box and remove the installation
disk. When prompted, restart Windows NT.
To install multiple adapters, repeat this procedure for each new adapter.
See page 11 for specific information.
To run the PROSet software at any time, double-click the Intel
PROSet icon in the Control Panel.


