41
Achten Sie auf die ordnungsgemäße
Erdungsverbindung des Gehäuses!
10. Gehäuse und Deckel festschrauben.
11. Funktion der LED prüfen!
Caution
5. Spannring (4) von der LED-Fassung (5) nach hinten
mit einem Schraubendreher abhebeln.
6. LED (7) vorsichtig nach hinten herausdrücken, dabei
die Fassung (5) gegenhalten.
7. Neue LED von hinten durch Spannring (4) in die
Fassung (5) drücken, dabei die Fassung vorn gegen-
halten.
8. Spannring (4) auf die Fassung (5) aufschieben, dabei
LED und Fassung vorn gegenhalten.
9. LED-Leitung im Kabelhalter (3) klemmen und
Stecker (1) auf Leiterplatte stecken.
LED-Leitung:
- muß straff gelegt sein,
- darf nicht an beweglichen Teilen
anliegen oder diese behindern.
Notice
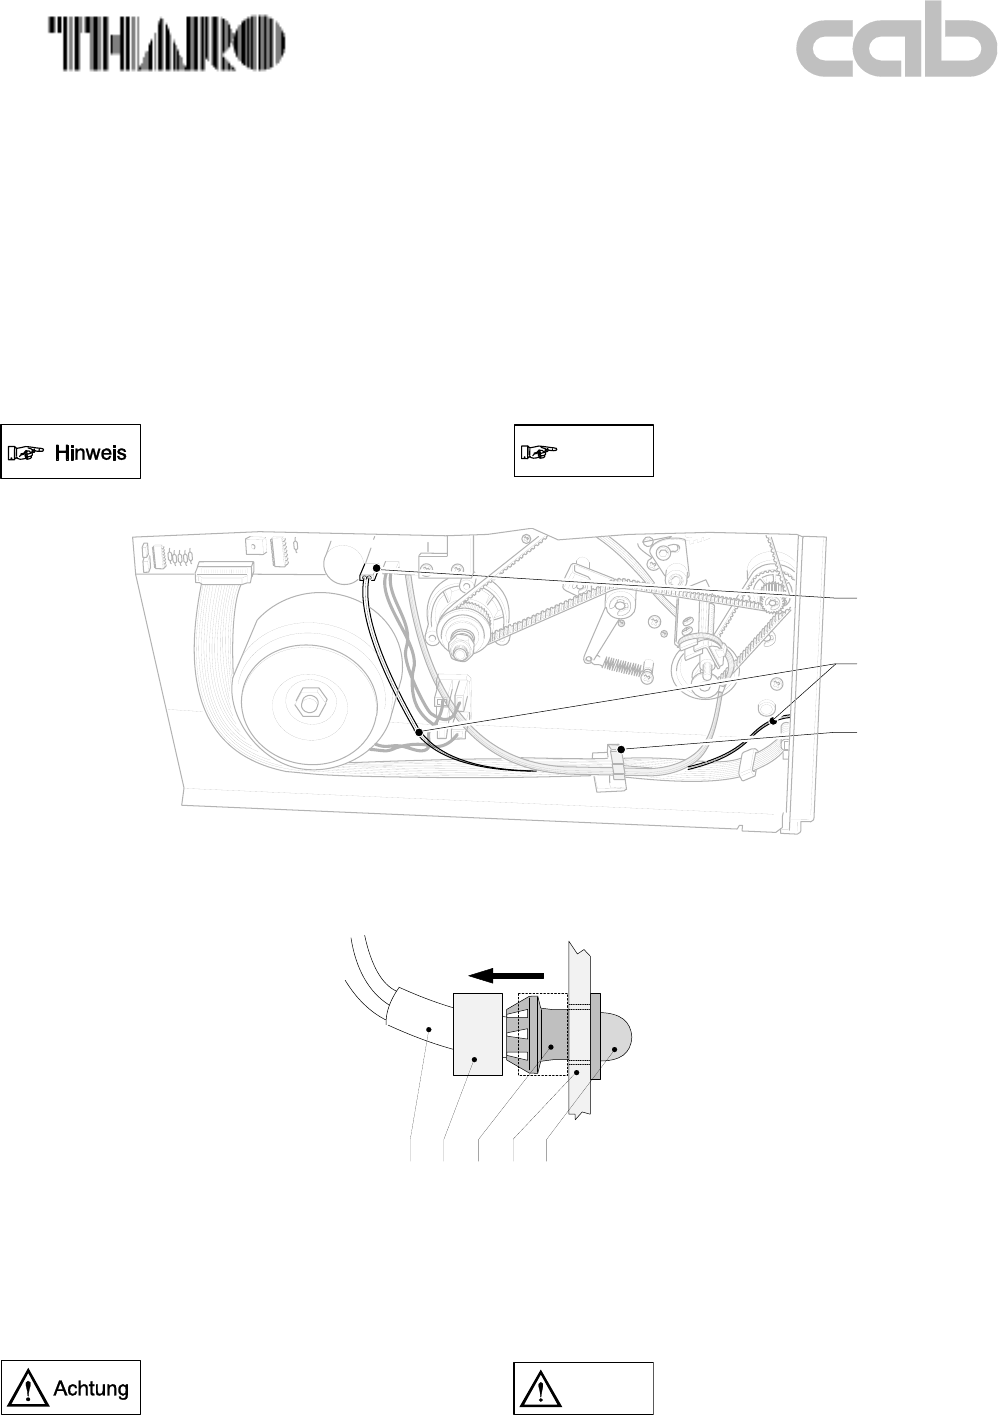
Bild 24 1 LED-Stecker
2 LED-Leitung
3 Kabelhalter
2
3
1
Bild 25 2 LED-Leitung
4 Spannring
5 LED-Fassung
6 Montageblech
7 LED
24567
5. Open cable holder (3) and remove the cable.
6. Remove the clamping ring (4) from the LED (7) by
prying backward using a screwdriver as a lever.
7. Carefully push the LED (7) out while holding against
the mount (5)
8. Push new LED into the mount while pressing against
mount from the front.
9. Feed the LED cable through cable holder (3) as it was
before and snap in cable holder (3).
LED cable must :
- be tightened,
- not touch moving parts or
hinder them.
Figure 24 1 LED plug
2 LED cable
3 Cable holder
Figure 25 2 LED cable
4 Clamping ring
5 LED retaining
6 Assembly plate
7 LED
Be sure to reinstall the ground wire to
the cover!
10. Reassemble casing and cover.
11. Check the function of the LED !


