Getting Started
18
ETS Installation Guide
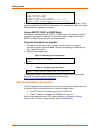
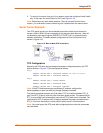
Type Help at the ‘Local_>’ prompt for assistance.
Enter Username> gopher
Local> SET PRIVILEGED
Password> system (not echoed)
Local>> DEFINE SERVER IPADDRESS 192.0.1.228
Local>> DEFINE SERVER SUBNET MASK 255.255.255.0
Any host wishing to access the ETS will have to be told the ETS’ IP address. This is
typically configured in the UNIX file /etc/hosts or via a nameserver. Refer to the host’s
documentation for additional information.
Using a BOOTP, DHCP, or RARP Reply
At boot time a host-based DHCP, BOOTP, or RARP server can respond to an ETS
request for an available IP address. For information about configuring the DHCP,
BOOTP, or RARP server, see your host documentation.
Using the Command Line Interface
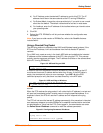
1. Connect to the serial port (Port_1) using a console terminal or a terminal
emulation program, and press Enter. The serial port settings are 9600 baud, 8
bits, 1 stop bit, no parity.
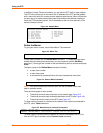
2. Become the privileged user.
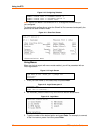
Figure 3-6. Becoming the Privileged User
Local> SET PRIVILEGED
Password> system (not echoed)
Local>>
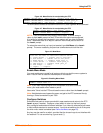
3. Enter the new IP address.
Figure 3-7. Configuring the IP Address
Local>> define server ipaddress 192.0.1.201
Local>> DEFINE SERVER SUBNET MASK 255.255.255.0
For additional command line reference (for use with Telnet or a terminal console),
see the ETS Reference Manual available for download from
www.lantronix.com/support/docs/index.html
.
Was the Installation Successful?
If the ETS appears to be working and the unit is connected to the network, there are
a couple of ways to confirm that the unit is visible to network hosts:
If the ETS has an IP address, ping it from a TCP/IP host.
If the ETS has an IP address, use EZWebCon to log into it.
When you are satisfied that the ETS is working properly, proceed to 3:Getting
Started. If the ETS does not boot properly, see B:Troubleshooting.


