


LTRx-512 Installer’s Guide
7
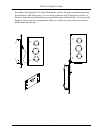
•
Using these same screws, attach an “L” bracket (or ear)
•
Repeat to attach the other ear
•
Mount the unit in the rack
•
Follow the wiring steps in the next chapter before attaching the box cover
•
Attach the furnished cover to the power supply using four 6-32 screws (two of these
screws you removed from the display unit)
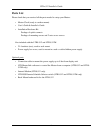
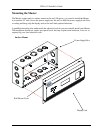
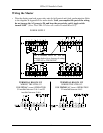
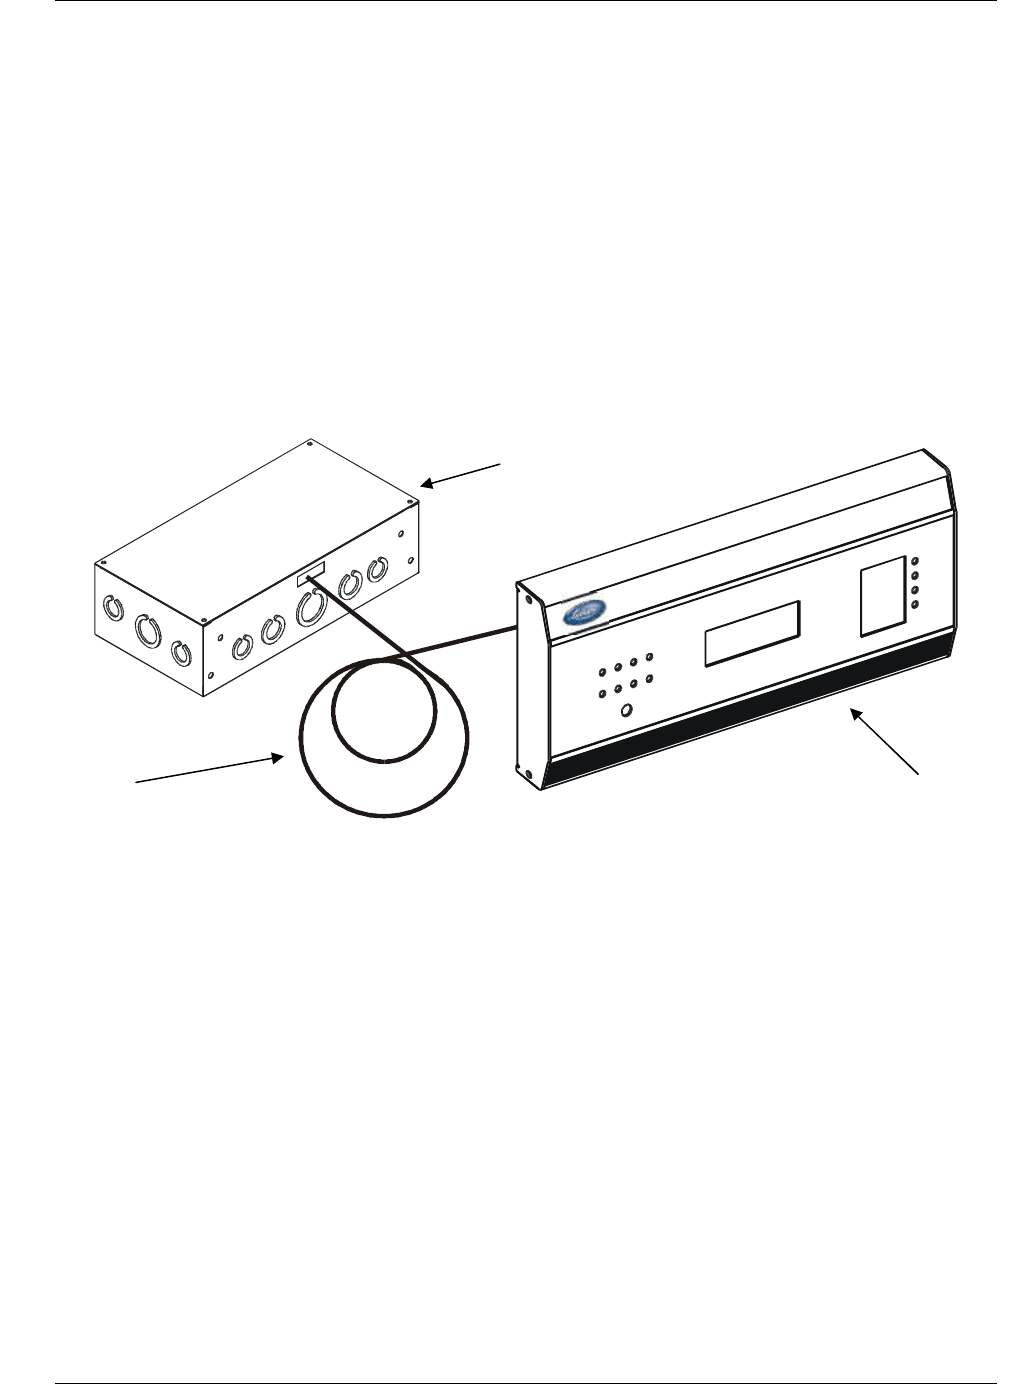
Hidden Power Supply Mount
You can hide the power supply portion of the Master above a dropped ceiling, under a raised
floor or behind a wall, up to 8 feet away from the display unit. This allows you to hide the
cables and gives a more pleasing look to your Master. To mount the Master this way, you
must purchase the 8-foot connection cable
To hide the power supply
•
Place the Master on its back with the display unit facing up and the keypad to the right
•
Remove the two screws from just above the display unit
•
Lift the display unit up and away from you. Note that two rivets at the bottom of the
cover prevent you from lifting it straight up
•
Unplug the ribbon power cable from the back of the display unit
•
Set the display unit aside
•
Detach the display unit from the power supply cover by removing the 4 screws on the
back of the display unit (IMPORTANT: These screws are the correct length so they do
not interfere with the circuit board inside the display unit. Using any other screws voids
any warranty)
•
Unplug the ribbon cable from the power supply board
•
Remove a knockout in the power supply and pass the 8-foot connection cable through it
using proper strain relief hardware. When properly installed, the cable will face away from
the transformer
8 foot cable
(optional)
Power Supply Box
Display Unit