4 Click Printer Settings.
5 Type the IP addresses of the source and target printers.
Note: If you want to add or remove target printers, then click Add Target IP or Remove Target IP.
6 Click Copy Printer Settings.
Creating a printer control panel PIN
The Panel PIN Protect menu lets you restrict access to the menus from the printer control panel. To restrict access to
the menus, create a Personal Identification Number (PIN), and then assign the PIN to each menu.
1 Open a Web browser, and then type the printer IP address in the address field.
Notes:
• View the printer IP address in the TCP/IP section in the Network/Ports menu. The IP address appears as four
sets of numbers separated by periods, such as 123.123.123.123.
• If you are using a proxy server, then temporarily disable it to load the Web page correctly.
2 Click Settings > Security > Panel PIN Protect.
3 From the Create User PIN or Create Admin PIN section, enter your PIN.
Note: Your can enter up to 16 digits for your PIN.
4 Click Modify.
5 From any menu in the Administrative Menus, Management, or Function Access sections, select User PIN
Protected, Admin PIN Protected, or Admin PIN and User PIN Protected.
Note: Using Admin PIN, you can still access a menu assigned with User PIN.
6 Click Submit.
If you try to access a PIN‑protected menu from the printer control panel, then the printer will require you to enter the
PIN.
Note: After you enter the last digit of the PIN, make sure to press
from the printer control panel for more than
three seconds.
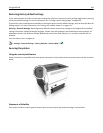
Printing a menu settings page
From the home screen, navigate to:
> Reports > Menu Settings Page
Using MS610de 103


