


14 Type in the Primary SMTP Gateway address, and then touch Enter.
15 If prompted, set the date and time, and then touch Continue.
When the home screen appears, the e-mail function is enabled.
Setting up the e-mail function
For e-mail to operate, it must be turned on in the printer configuration and have a valid IP address or gateway address.
To set up the e-mail function:
1 Type the printer IP address into the address field of your Web browser.
Note: If you do not know the IP address of the printer, then print a network setup page and locate the IP address
in the TCP/IP section.
2 Click Settings.
3 Under Default Settings, click E-mail/FTP Settings.
4 Click E-mail Settings.
5 Click Setup E-mail Server.
6 Fill in the fields with the appropriate information.
7 Click Add.
Configuring the e-mail settings
1 Type the printer IP address into the address field of your Web browser.
Note: If you do not know the IP address of the printer, then print a network setup page and locate the IP address
in the TCP/IP section.
2 Click Settings.
3 Click E-mail/FTP Settings.
4 Click E-mail Settings.
5 Fill in the fields with the appropriate information.
6 Click Submit.
Creating an e-mail shortcut
Creating an e-mail shortcut using the Embedded Web Server
1 Type the printer IP address into the address field of your Web browser.
Note: If you do not know the IP address of the printer, then print a network setup page and locate the IP address
in the TCP/IP section.
2 Click Settings.
3 Under Other Settings, click Manage Shortcuts.
4 Click E-mail Shortcut Setup.
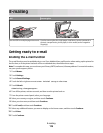
E-mailing
117