Windows
19
Installing drivers for network printing
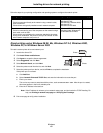
Follow the steps for your printing configuration and operating system to configure the network printer:
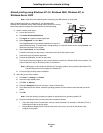
Direct printing using Windows 98 SE, Me, Windows NT 4.0, Windows 2000,
Windows XP, or Windows Server 2003
To install a custom printer driver and network port:
1 Launch the drivers CD.
2 Click Install Printer and Software.
3 Click Agree to accept the license agreement.
4 Select Suggested, and click Next.
5 Select Network Attach, and click Next.
6 Select the printer model from the list, and click Next.
7 Select the printer port from the list, and click Finish to complete the installation.
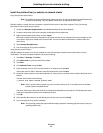
If the printer port is not listed:
a Click Add Port.
b Select Lexmark Enhanced TCP/IP Port, and enter the information to create the port.
c Enter a port name.
This can be any name to associate with the printer, such as Monochrome1-lab4. After the port is created,
this name appears in the list of available ports.
d Enter the IP address in the text box.
Note: If the IP address is unknown, print a network setup page, and look under the TCP/IP heading. For
help, see Printing a network setup page and Verifying the IP settings.
8 Print a test page to verify printer installation.
Printing configuration Operating system Go to page
Direct
• Printer is connected directly to the network using a network cable,
such as Ethernet.
• Printer drivers are typically installed on each network computer.
Windows 98 SE,
Windows NT 4.0,
Windows Me, Windows 2000,
Windows XP, or
Windows Server 2003
19
Shared
• Printer is connected to one of the computers on the network using a
local cable, such as USB.
• Printer drivers are installed on the computer attached to the printer.
• During driver installation, the printer is set up to be “shared” so that
other network computers can print to it.
Windows NT 4.0,
Windows 2000, Windows XP,
or Windows Server 2003
20
Printer
Clients


