


9
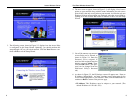
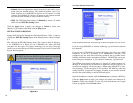
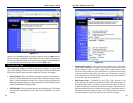
3. The following screen, shown in Figure 5-2, displays how the Access Point
is configured in this Setup Wizard. Optimally, you should perform this
setup through a PC on your wired network. Click the Next button to con-
tinue or Exit to exit the Setup Wizard.
8
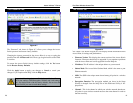
4. The next screen to appear, shown in Figure 5-3, will display a list of access
points on your network along with the status information for each access
point. If this is the only access point on your network, it will be the only one
displayed. If there are more than one displayed, select the Access Point by
clicking on it and click the Yes button to continue or No to exit the Setup
Wizard.
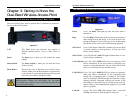
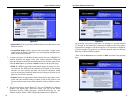
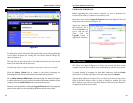
5. You will be asked to sign onto the
Access Point you’ve selected, as
shown in Figure 5-4. Enter the
Password you’ve assigned. If
none has been assigned, enter the
default password: admin. Then,
click the OK button. (This pass-
word can be changed from the
Web-based Utility’s Password
tab.)
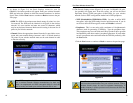
6. As shown in Figure 5-5, the IP Settings screen will appear next. Enter an
IP Address, Subnet Mask, and enter a unique access point name for the
Access Point appropriate to your network. Then, click the Next button to
continue or Back to return to the previous page.
• IP Address. This IP address must be unique to your network. (The
default IP address is 192.168.1.250.)
Dual-Band Wireless Access PointInstant Wireless
TM
Series
Figure 5-2
Figure 5-3
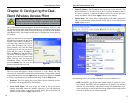
Figure 5-1
Figure 5-4