20
Chapter 5: Setting up the Wireless-G Game Adapter for PlayStation®2 or GameCube™
Connecting the Game Adapter to Your Game Console
Wireless-G Game Adapter
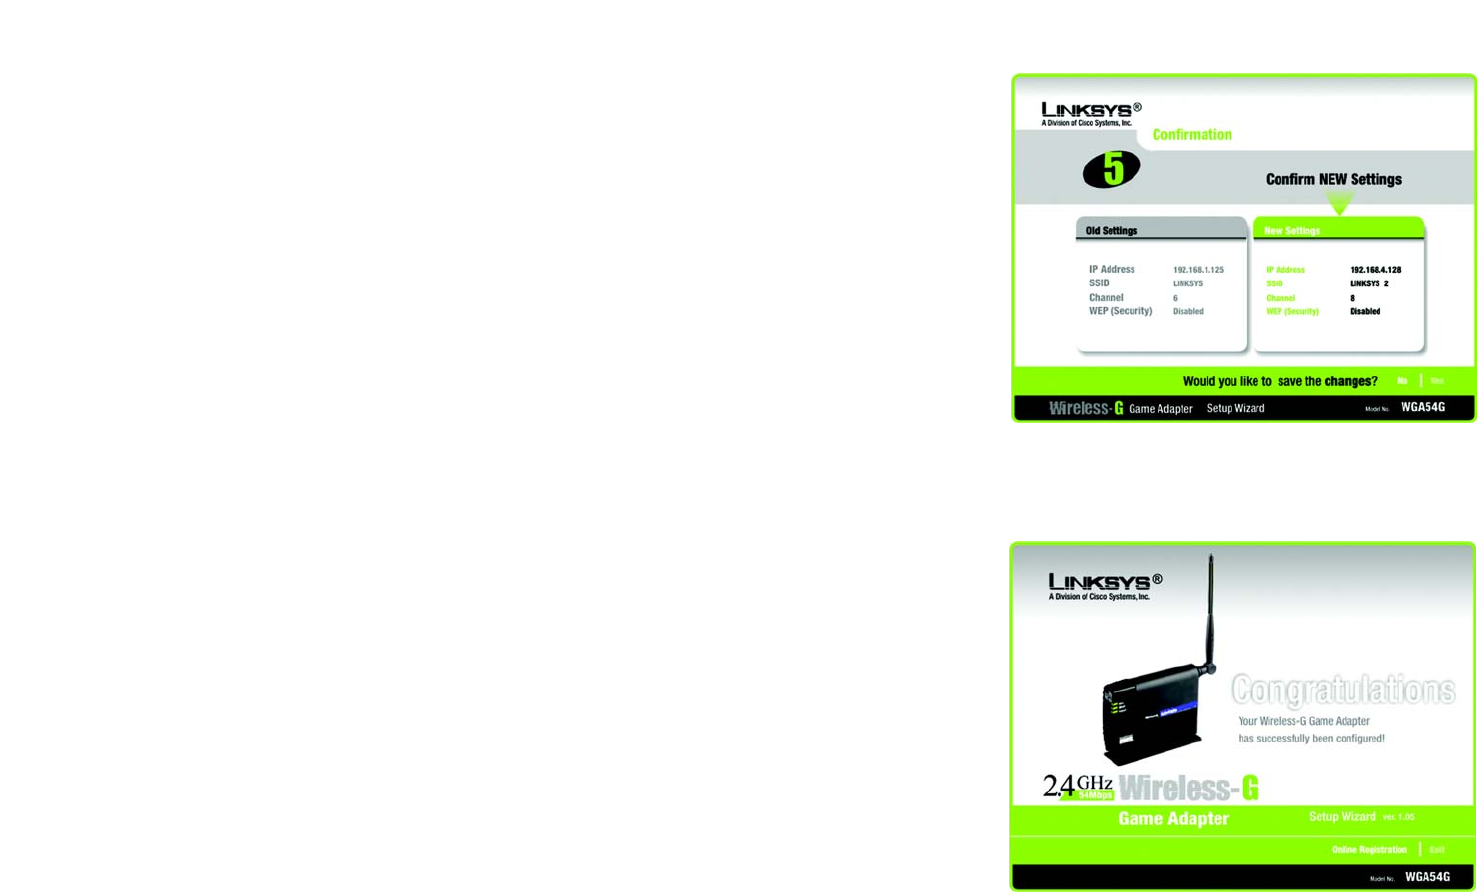
5. On the Confirmation screen, verify that the Game Adapter’s settings are correct. Then click the Yes button to
save these settings.
6. Now that the settings have been confirmed, click the Online Registration button to register the Game
Adapter, or click the Exit button to close the Setup Wizard.
Proceed to the section, “Connecting the Game Adapter to Your Game Console.”
Connecting the Game Adapter to Your Game Console
Now that the Game Adapter is properly configured, you can connect the Game Adapter to your game console and
play head-to-head or Internet gaming.
1. Unplug the Game Adapter’s power adapter from the electrical outlet.
2. Unplug the Ethernet network cable from your computer.
3. Make sure your game console is powered off. Then plug the Ethernet network cable into the Ethernet network
port of your game console.
4. Plug the Game Adapter’s power adapter into an electrical outlet, preferably a surge protector.
5. Power on your game console, and set it for multiplayer gaming.
Congratulations! The installation of the Wireless-G Game Adapter is complete.
If you would like to make any advanced configuration changes, refer to “Chapter 7: Using the
Wireless-G Game Adapter Web-based Utility.”
Figure 5-23: Setup Wizard’s Confirmation Screen
Figure 5-24: Setup Wizard’s Congratulations Screen
