


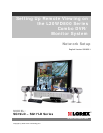

Setting up Remote Viewing
2
Setting up Remote Viewing
Setting up the Remote Viewing Feature requires several steps. Networking skills are
required to correctly configure the remote viewing functions.
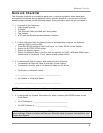
What do you need?
• The LCD/DVR System.
• A PC with the installed with the Lorex Client 2.0 software (refer to the Software
Guide for installation instructions)
• A Router (not provided with the system)
• High Speed Cable or DSL Internet Connectivity* (for remote viewing outside your
network)
* Note: High Speed Internet refers to a minimum Upload speed of 384 kbps. If sending
multiple channels of data (8 or 16 cameras) it is recommended that you work with your
Internet Service Provider to increase your Upload speed to 500 kbps or greater. If you are
unsure, please call your Internet Service Provider to verify your network speed.
If you are still unsure of your speed, see our Troubleshooting Section at the end of this
document for some steps to help you find your connection speed.
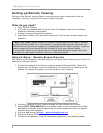
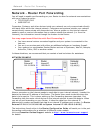
Network Setup / Remote Access Overview
The System can be remotely controlled using your existing network and the Lorex Client 2.0
software or Internet Explorer.
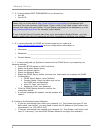
1. Connect the System to the Router using the supplied Ethernet Cable. Power the
System on. The System must be connected to the router prior to powering on the
system. This allows the system to communicate on your network.
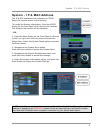
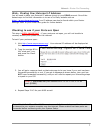
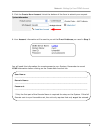
2. Find the IP address of your System through the Menu System on the unit.
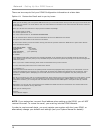
3. Enable PORT FORWARDING on your Router. Refer to the included Router Guide
and Basics of Remote Video Access Guide for further assistance with your specific
network setup and hardware.
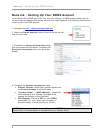
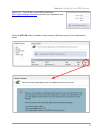
4. Set up a web account at http://ddns.strategicvista.net
.
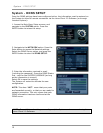
5. Setup the System DDNS.
6. Configure the software, using the information gathered on the following pages.