28
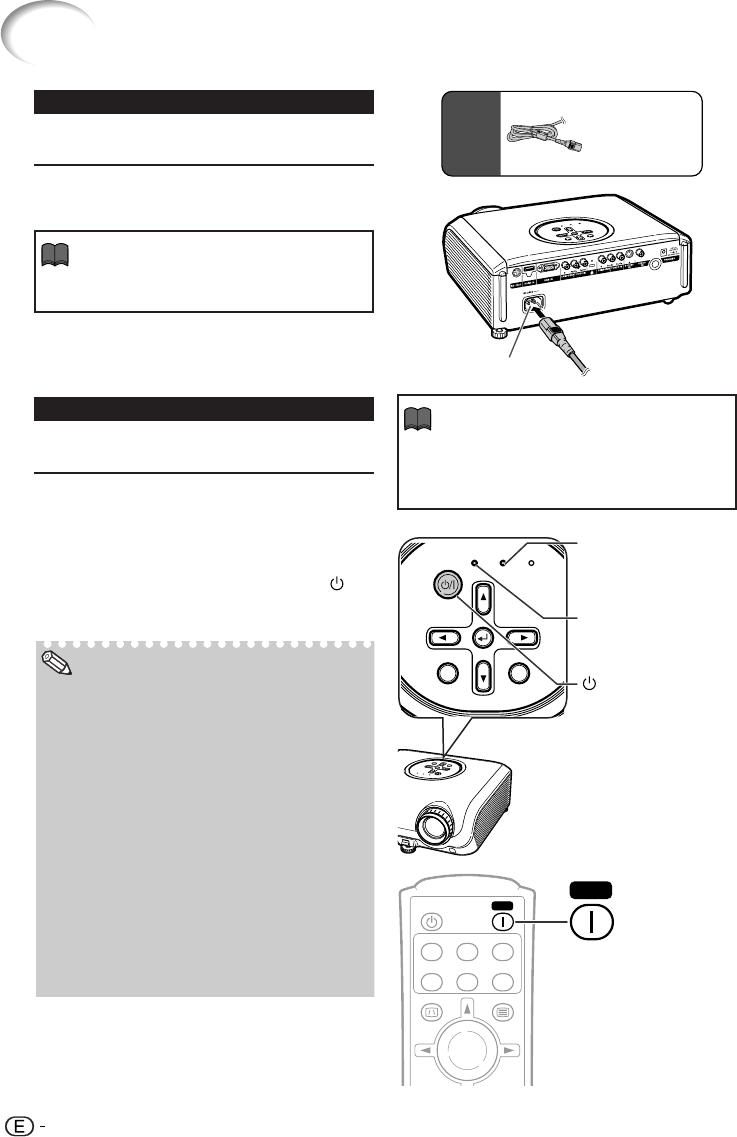
Turning the Projector On/Off
Remove the lens cap and press / I
STANDBY/ON on the projector or bON
on the remote control.
• About the Lamp Indicator
The lamp indicator illuminates to indicate the
status of the lamp.
Green: The lamp is on.
Blinking in green: The lamp is warming up
or shutting down.
Red:The lamp is shut down abnormally
or the lamp should be replaced.
• When switching on the projector, a slight flick-
ering of the image may be experienced within
the first minute after the lamp has been illumi-
nated. This is normal operation as the lamp’s
control circuitry is stabilising the lamp output
characteristics. It should not be regarded as
faulty operation.
• If the projector is put into standby mode and
immediately turned on again, the lamp may
take some time to start projection.
/ I STANDBY/ON
button
A
S
P
E
C
T
E
N
T
E
R
I
N
P
U
T
M
E
N
U
IN
P
U
T
S
T
A
N
D
B
Y
/
O
N
L
A
M
P
T
E
M
P
.
ASPECT
ENTER
INPUT
MENU
INPUT
STANDBY/ON LAMP TEMP.
Note
Lamp indicator
• English is the factory default language. If you
want to change the on-screen display to another
language, change the language according to
the procedure on page 50.
Info
C1
V
C2 S
STANDBY
COMP.1 COMP.2 S-VIDEO
VIDEO RGB HDMI
RGB HDMI
ONON
KEYSTONE MENU
ON
ON
Turning the Projector on
Note that the connections to external equip-
ment and power outlet should be done be-
fore performing the operations written be-
low. (See pages 23 to 28.)
Power indicator
ON button
AC socket
A
S
P
E
C
T
E
N
T
E
R
I
N
P
U
T
M
E
N
U
I
N
P
U
T
STAN
DB
Y
/
O
N
LA
MP
T
E
M
P.
Power cord
Supplied
accessory
Connecting the Power Cord
Plug the supplied power cord into the AC
socket on the rear of the projector.
• Make sure the AC power cord is firmly con-
nected into the AC IN socket.
Info
06.7.19, 4:25 PMPage 28


