MICROBOARDS TECHNOLOGY, LLC GX AUTO PRINTER
9
Windows Vista Hardware Installation
The Microboards GX Auto Printer Installer should always be run when logged in as user with full
Administrator rights. This is required for the driver pre-installation to be successful. Once the GX
Auto Printer is plugged into the PC via the USB connection, the hardware will automatically be found
and installed on your PC.
During the driver pre-installation, you may need to verify that you would like to install the drivers.
If the Installer is run by a user without full Administrator rights, or you do not verify that the drivers
should be installed, the hardware will need to be installed using the Hardware Wizard. Please follow
the directions below.
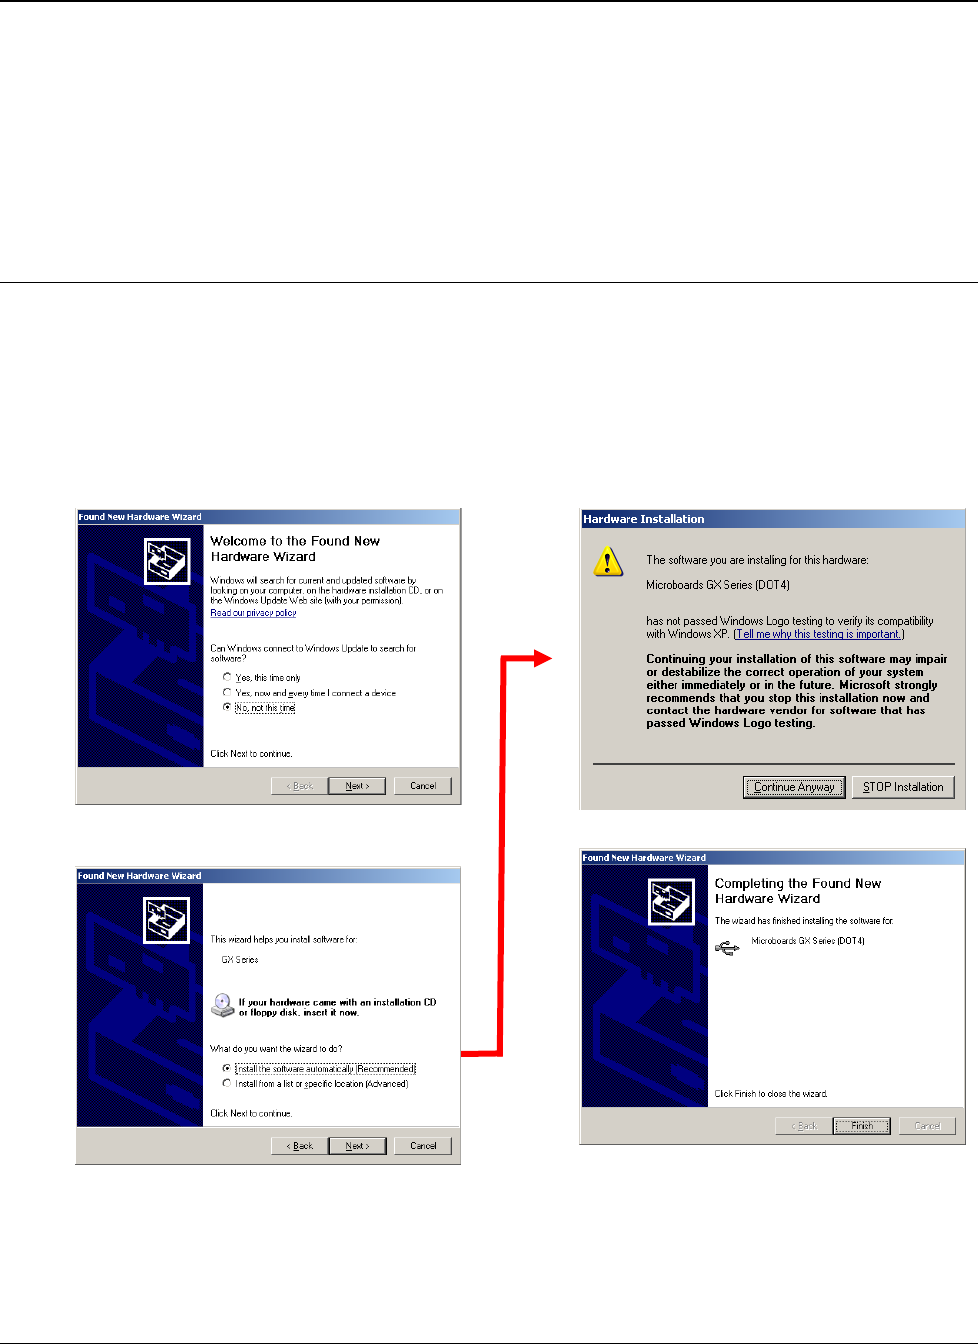
Windows XP Hardware Installation
The Windows Found New Hardware Wizard will appear during any installation, including when using
the Installer. Please follow all directions in the order in which they appear when using the Installer.
Install the GX-300HC cartridge and turn on power to the GX Auto Printer.
Insert the Microboards GX Auto Printer CD into a drive in your computer. Follow the instructions
provided by the Installer. Connect the GX Auto Printer to the PC only when you are prompted to.
Once the GX Auto Printer is connected, the operating system will next display the following screen:
1. Select No, not this time and click
Next.
2. Click Next.
3. Click Continue Anyway.
4. Click Finish for the next screen.


